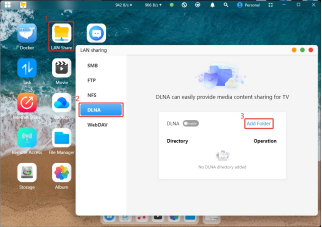


Sharing Protocols and Features
CyberData supports multiple file transfer protocols, including SMB, FTP, NFS, DLNA, and WebDAV.
Different protocols offer varying functionalities. Below is an introduction to the features and operational guidance for each file transfer protocol.
Operational Guidance: Open CyberData, enable the desired service (such as SMB, NFS, DLNA, etc.) under Local Area Network Sharing, and proceed with the relevant configuration.
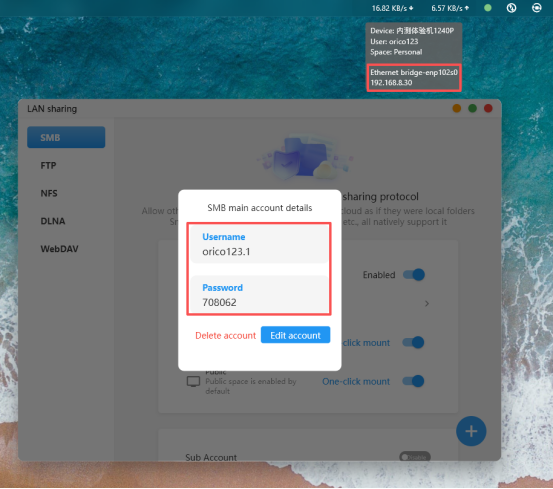
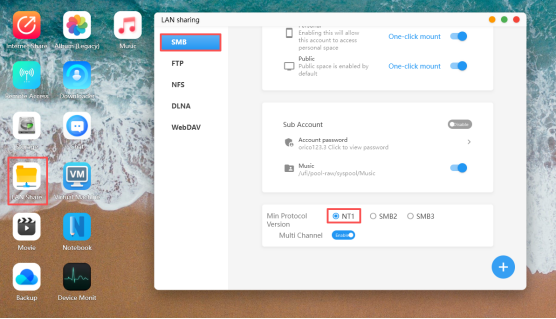
Allows users within a local area network to mount shared folders from the NAS device onto their local computers, enabling centralized file storage and unified management. Supports NT1, SMB2, and SMB3 protocols to ensure the security and stability of file transfers.
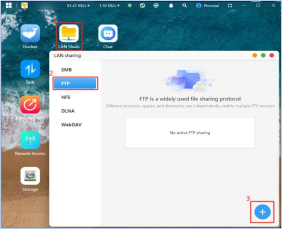
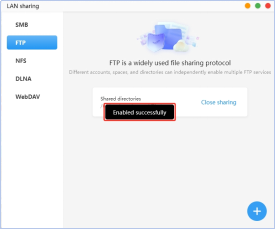
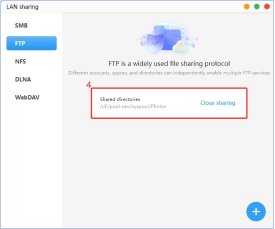
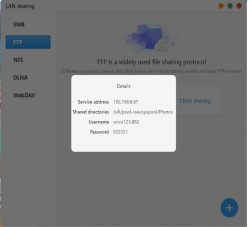
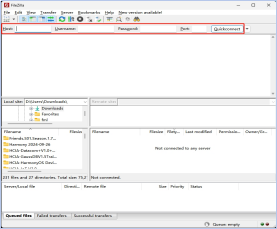
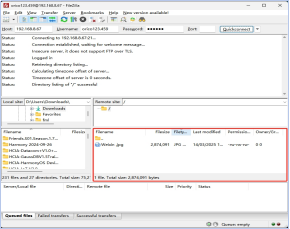
FTP (File Transfer Protocol) is a standard network protocol used for transferring computer files between a client and a server on a computer network. The FTP protocol provides a simple and convenient method for file transfer, supports FTPS encrypted transmission, and is suitable for automatically backing up data such as camera photos to the NAS.
WebDAV allows clients to create, edit, move, and delete remote files via HTTP/HTTPS. It supports cross-platform collaborative editing and resource sharing, and is suitable for integration with supporting web applications to achieve file management and access within applications.
NFS (Network File System) is a network file system protocol based on TCP/IP transmission. Through the NFS protocol, clients can access shared resources on remote servers as if they were local directories. It is primarily used in Unix/Linux environments, allows file sharing between different machines, and is ideal for using the NAS as network storage for other devices.
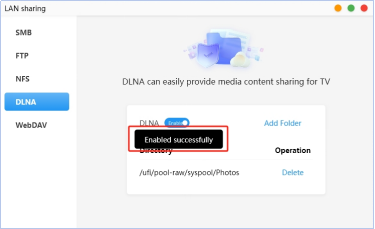
The DLNA function can build a home entertainment network, allowing electronic devices such as computers, smartphones, TVs, and set-top boxes to easily access resources like photos, music, and videos.
After enabling this service, all devices and applications within the local area network that support the DLNA protocol can discover the current device and are permitted to access multimedia files within the DLNA scan path.
Common Samba Error Messages & Troubleshooting for Mapping Failures
(一) Check for network connectivity issues.
1.First, confirm that the NAS and your computer are on the same local network.
(Samba is only accessible within a local network — it cannot be accessed remotely via P2P or tunneled connections.)
Example: Many homes have two routers, or a fiber modem + router setup.
For instance, if your NAS is connected to Router A, while your computer is connected to Router B (either via Ethernet or Wi-Fi), and the two routers are not set to repeater/AP mode or part of a Mesh network, they are not on the same local network.
To access Samba, please connect your NAS to the same router or switch as your computer.
(If the devices are too far apart and cannot be connected directly, please contact a professional network technician or your router's support team to help bridge the two networks.)
(二) Error: “Access Denied” or “You do not have permission to access this shared folder”
1. Error message displayed
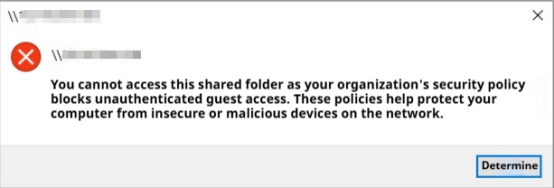

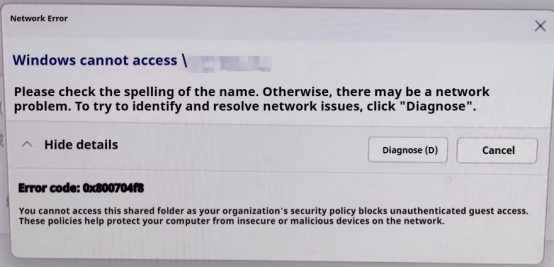
2. Solution
Method 1: Modify Group Policy to enable "Insecure guest logons"
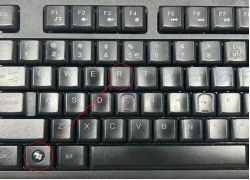
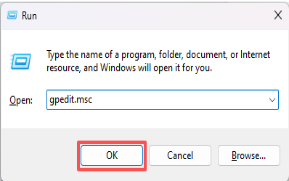
(1) Press Win + R to open the Run dialog, type gpedit.msc, and click OK to open the Local Group Policy Editor.
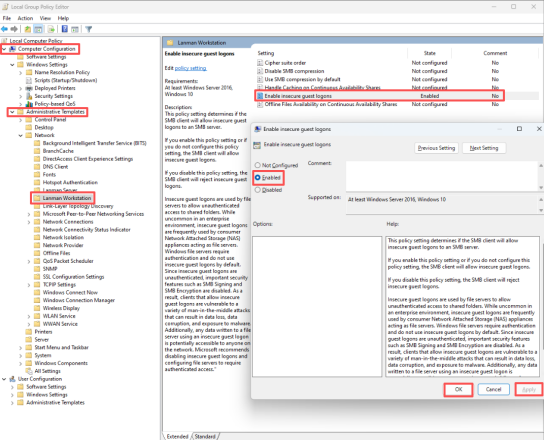
(2) Navigate to: Local Computer Policy → Computer Configuration → Administrative Templates → Network → Lanman Workstation. In this path, double-click "Enable insecure guest logons", select "Enabled", then click "Apply" and "OK" to apply the change.
Method 2: Enable SMB1.0/CIFS File Sharing Support
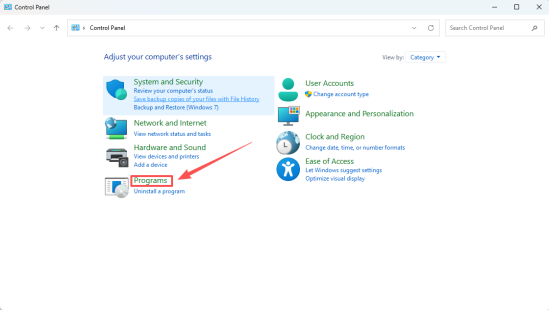
(1) Click the search box in the lower-left corner of Windows, type Control Panel, and select the Control Panel option.


(2) In the pop-up window, locate “Programs”.
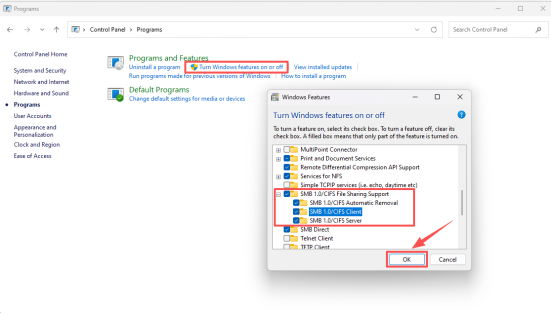
(3) Click “Turn Windows features on or off”, locate “SMB 1.0/CIFS File Sharing Support”, check all sub-items under it, then click OK to save. Restart your computer when prompted.
(三)Windows cannot access — error code: 0x80070035 Network path not found.
1.Error message displayed.
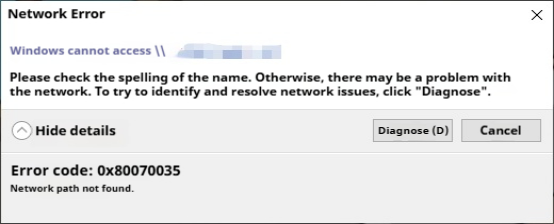
2.Solution
Method 1: For manual mapping failures on Windows 7. Open CyberCloud App → Local Network Sharing → SMB → Change the protocol version to NT1.
Method 2: Windows 11 24H2 and later cannot access Samba
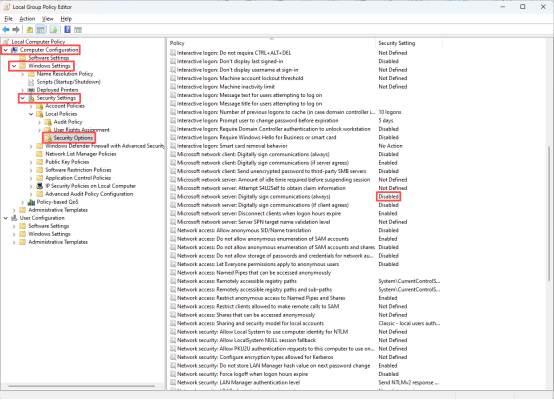
After updating to Windows 11 24H2, the system enforces SMB signing, which may block access to Samba shares.
(1) Navigate to: Computer Configuration → Windows Settings → Security Settings → Local Policy → Security Options. In the right panel, locate "Microsoft Network Client: Digitally sign communications (always)" and set it to Disabled.
Method 3: For similar issues in the Windows 10 system, you can perform the following operations.
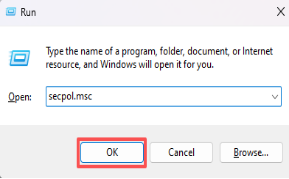
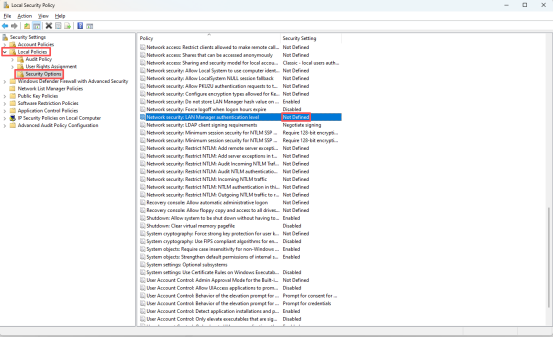
(1) Press Win+R at the same time to run secpol.msc. On the Local Security Policy page, click "Local Policies" - "Security Options" - "Network security: LAN Manager authentication level" in sequence. Double-click it, change it to "Send NTLMv2 response only. Refuse LM & NTLM", and click OK to save.
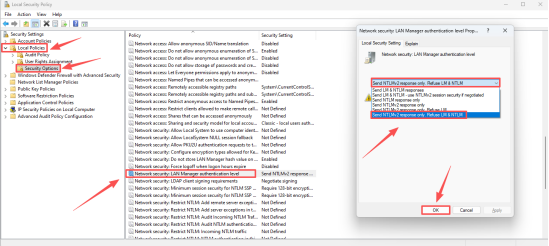
(2) Alternatively, you can also change it to "Not Defined".
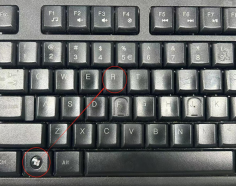
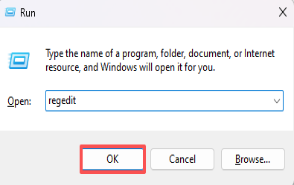
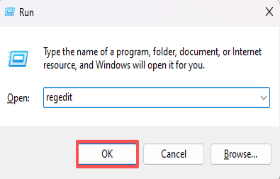
First, press Win+R and enter regedit to open the Registry Editor. Navigate to the following registry path:
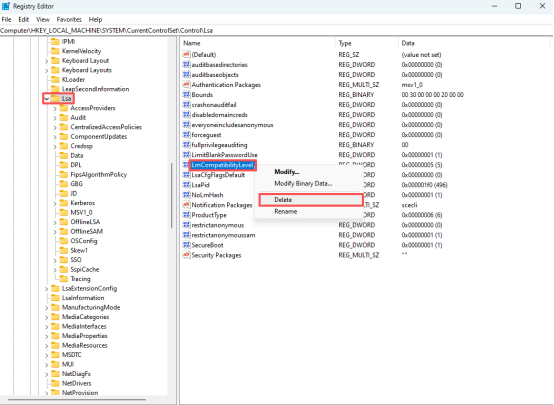
HKEY_LOCAL_MACHINE\SYSTEM\CurrentControlSet\Control\Lsa
Then directly delete the LMCompatibilityLevel key and confirm the deletion.
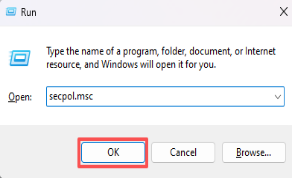
After performing the above steps, press Win+R and run the secpol.msc command to open the Local Security Policy. Check the "Network security: LAN Manager authentication level" setting — it should now show the default value "Not Defined". After this modification, you will find that entering the account and password allows direct access.

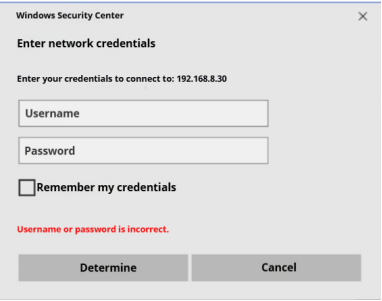
(四) The entered username or password is incorrect.
1.Error message displayed.
2.Solution.
Method 1: Enable or disable SMB 1.0/CIFS File Sharing Support.
(1) Click the search box in the lower-left corner of the Windows system, enter "Control Panel", and click the Control Panel option.
(2) In the window that appears, find "Programs".
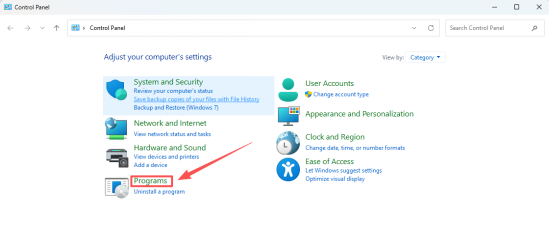
(3) Click "Turn Windows features on or off", find "SMB 1.0/CIFS File Sharing Support", and check/enable all options under it. Then save the changes and restart the computer.
Method 2: For similar issues in the Windows 10 system, you can perform the following operations.
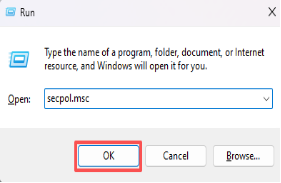
(1) Press Win+R at the same time to run secpol.msc. On the Local Security Policy page, click "Local Policies" - "Security Options" - "Network security: LAN Manager authentication level" in sequence. Double-click it, change it to "Send NTLMv2 response only. Refuse LM & NTLM", and click OK to save.
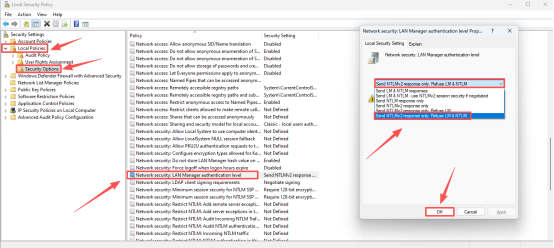
(2) Alternatively, you can also change it to "Not Defined".
First, press Win+R and enter regedit to open the Registry Editor. Navigate to the following registry path:
HKEY_LOCAL_MACHINE\SYSTEM\CurrentControlSet\Control\Lsa
Then directly delete the LMCompatibilityLevel key and confirm the deletion.
After performing the above steps, press Win+R and run the secpol.msc command to open the Local Security Policy. Check the "Network security: LAN Manager authentication level" setting — it should now show the default value "Not Defined". After this modification, you will find that entering the account and password allows direct access.
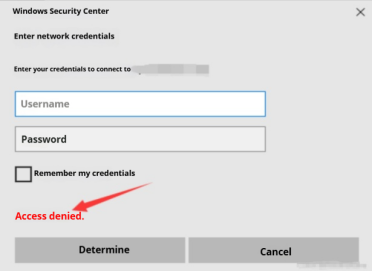
(五) Access denied after entering username and password.
1.Error message displayed.
2.Solution.
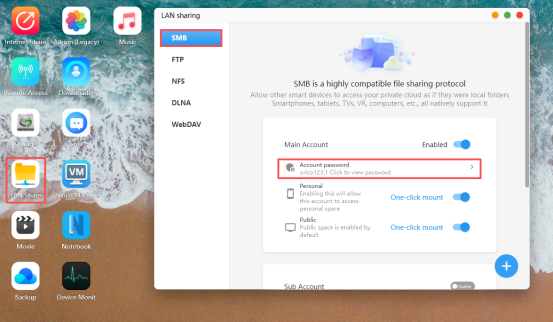
Method 1: Check whether Samba has a password set. Open the Cyber Cloud Space APP, go to Local Area Network Sharing > SMB > Account/Password section. Samba access requires a password to be set in order to work properly. If a password has already been set, you can try changing it.
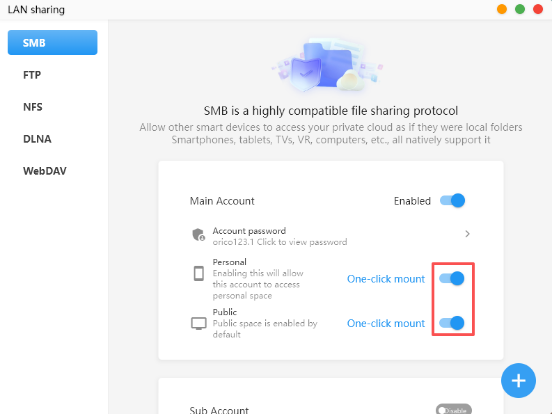
Method 2: Re-enable the mounted path, then perform the mounting again.
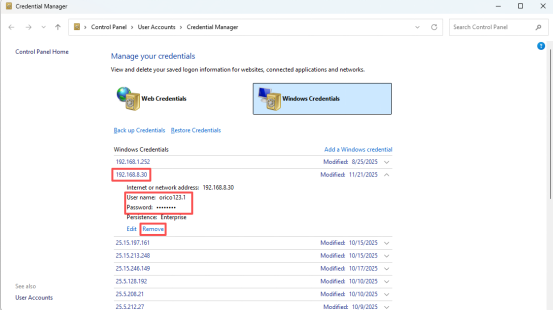
Method 3: In Windows Credentials, find the Windows credentials previously used for mapping the Samba share and delete them.
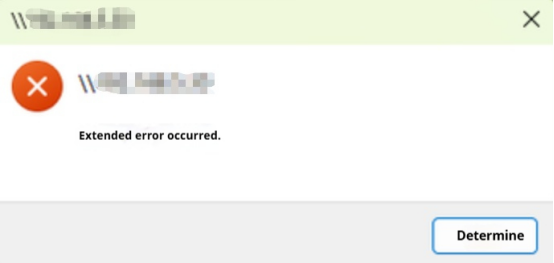
(六) An extended error occurred when accessing Samba.
1.Error message displayed.
2.Solution.
Method 1: Modify Group Policy and enable the "Insecure guest logons" policy.
(1) Press Win+R to open the Run dialog box, enter gpedit.msc, click OK, and open the Local Group Policy Editor.
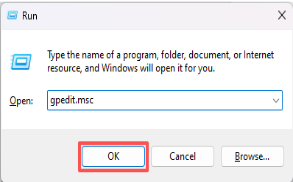
(2) Navigate to "Local Computer Policy > Computer Configuration > Administrative Templates > Network > Lanman Workstation". In this location, enable the "Enable insecure guest logons" policy. After clicking "Apply", select "OK" to make it take effect.
Method 2: Modify the registry.
(1) Create a new text document and copy and paste the following content into it:
Windows Registry Editor Version 5.00
[HKEY_LOCAL_MACHINE\SYSTEM\CurrentControlSet\Services\LanmanWorkstation\Parameters]
"AllowInsecureGuestAuth"=dword:00000001
"RequireSecuritySignature"=dword:00000000
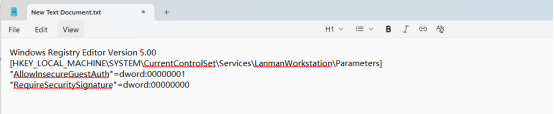
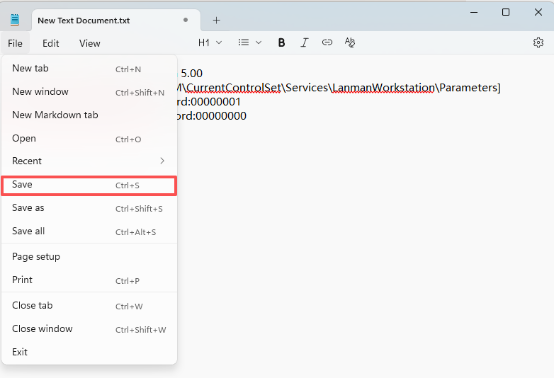
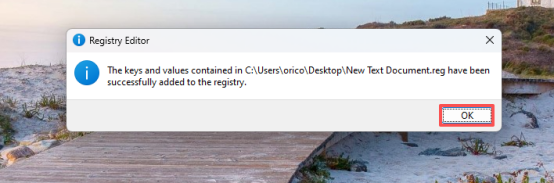
(2) After saving the file, change the file extension from .txt to .reg, then double-click it to run.
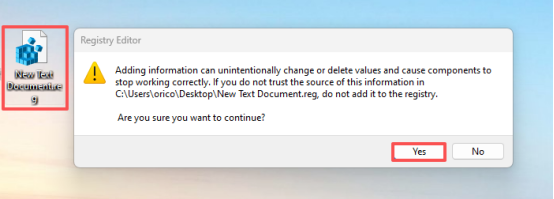
(3) Click OK, and finally restart the computer. Please note that the registry changes will not take effect until the system is restarted.
Method 3: Modify via PowerShell script to disable the "security signature enforcement requirement" for the SMB client.
(1) Search for "PowerShell" in the taskbar and run it as administrator.

(2) Enter the command:Set-SmbClientConfiguration -RequireSecuritySignature $false
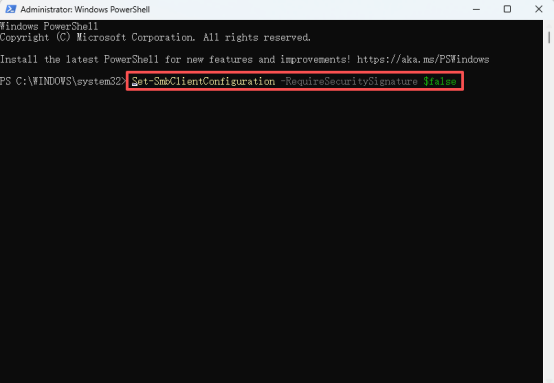
(3) Enter "Y" and press Enter. If no error is reported, the change will take effect.
(七) The system prompts that one or more users are not allowed to access simultaneously.
1.Error message displayed.
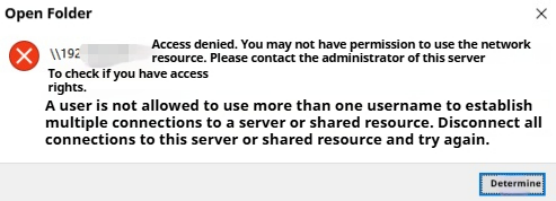
2.Solution.
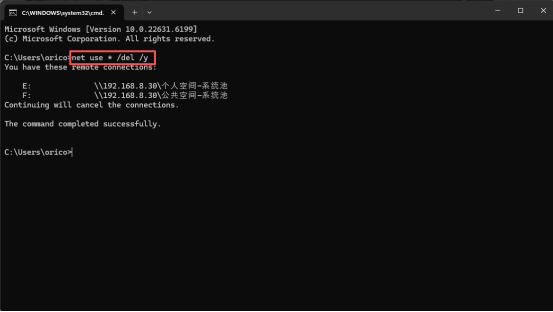
Restart the computer or clear the Samba cache and then remap the drive to resolve the issue.
(1) Find Run on your computer or press the Win+R key combination to open the Run dialog. In the dialog, enter cmd and press Enter.
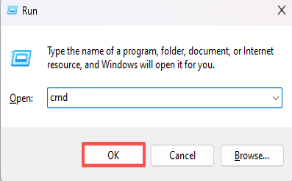
(2) In the Command Prompt window, execute the command net use * /del /y and press Enter.
(八) After each successful mapping, the mapped drive disconnects after a period of time. This issue requires adding Windows credentials.
1.Error message displayed.
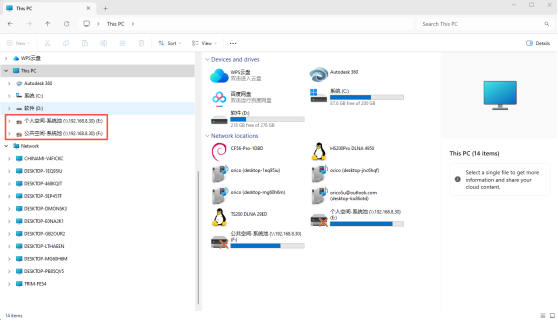
2.Solution.
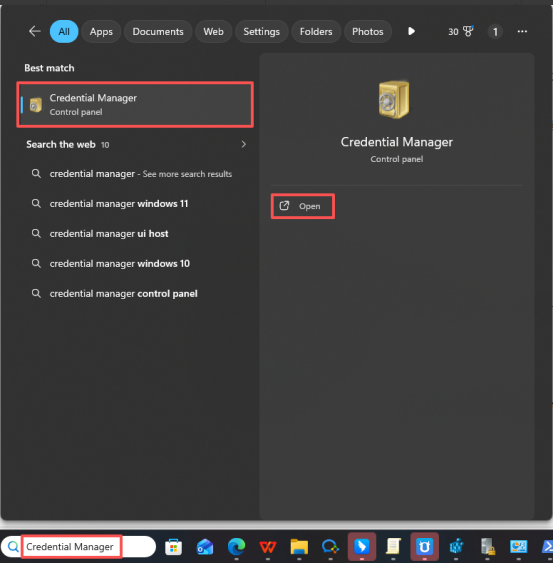
(1) Open Credential Manager.
(2) Add Windows Credentials.
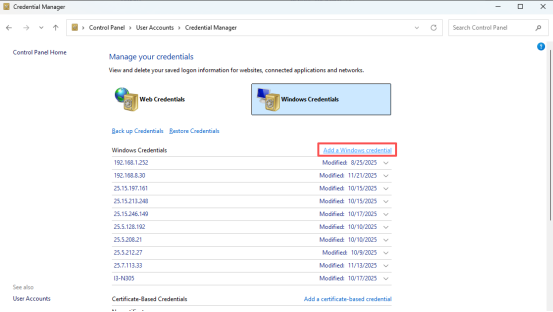
(3) Add the IP address and the configured Samba username and password to the credentials, then click OK.

Note: On the local area network, you can find the IP address of the Cyber Cloud Space as well as the configured Samba username and password.