

Syncthing is an open-source file synchronization tool that can synchronize files or folders between multiple devices in real time.
During the synchronization process, data is not uploaded to any cloud server but is transferred directly between the devices you have specified.
It supports multiple platforms and can run on operating systems such as Windows, macOS, and Linux.
Note: When using Syncthing for file synchronization, both the device uploading data and the device receiving data must be online and running the Syncthing program at the same time for the synchronization to proceed smoothly.
The Featured Images section pre-configures parameters for commonly used community images, eliminating the need for users to understand complex installation and setup processes, and automatically creates desktop shortcuts.
(The following steps use NAS Device A and NAS Device B as an example for real-time file/folder synchronization.)
Both NAS Device A and NAS Device B must first log in to the Cyber Cloud software and start the Syncthing program. The specific steps are as follows:
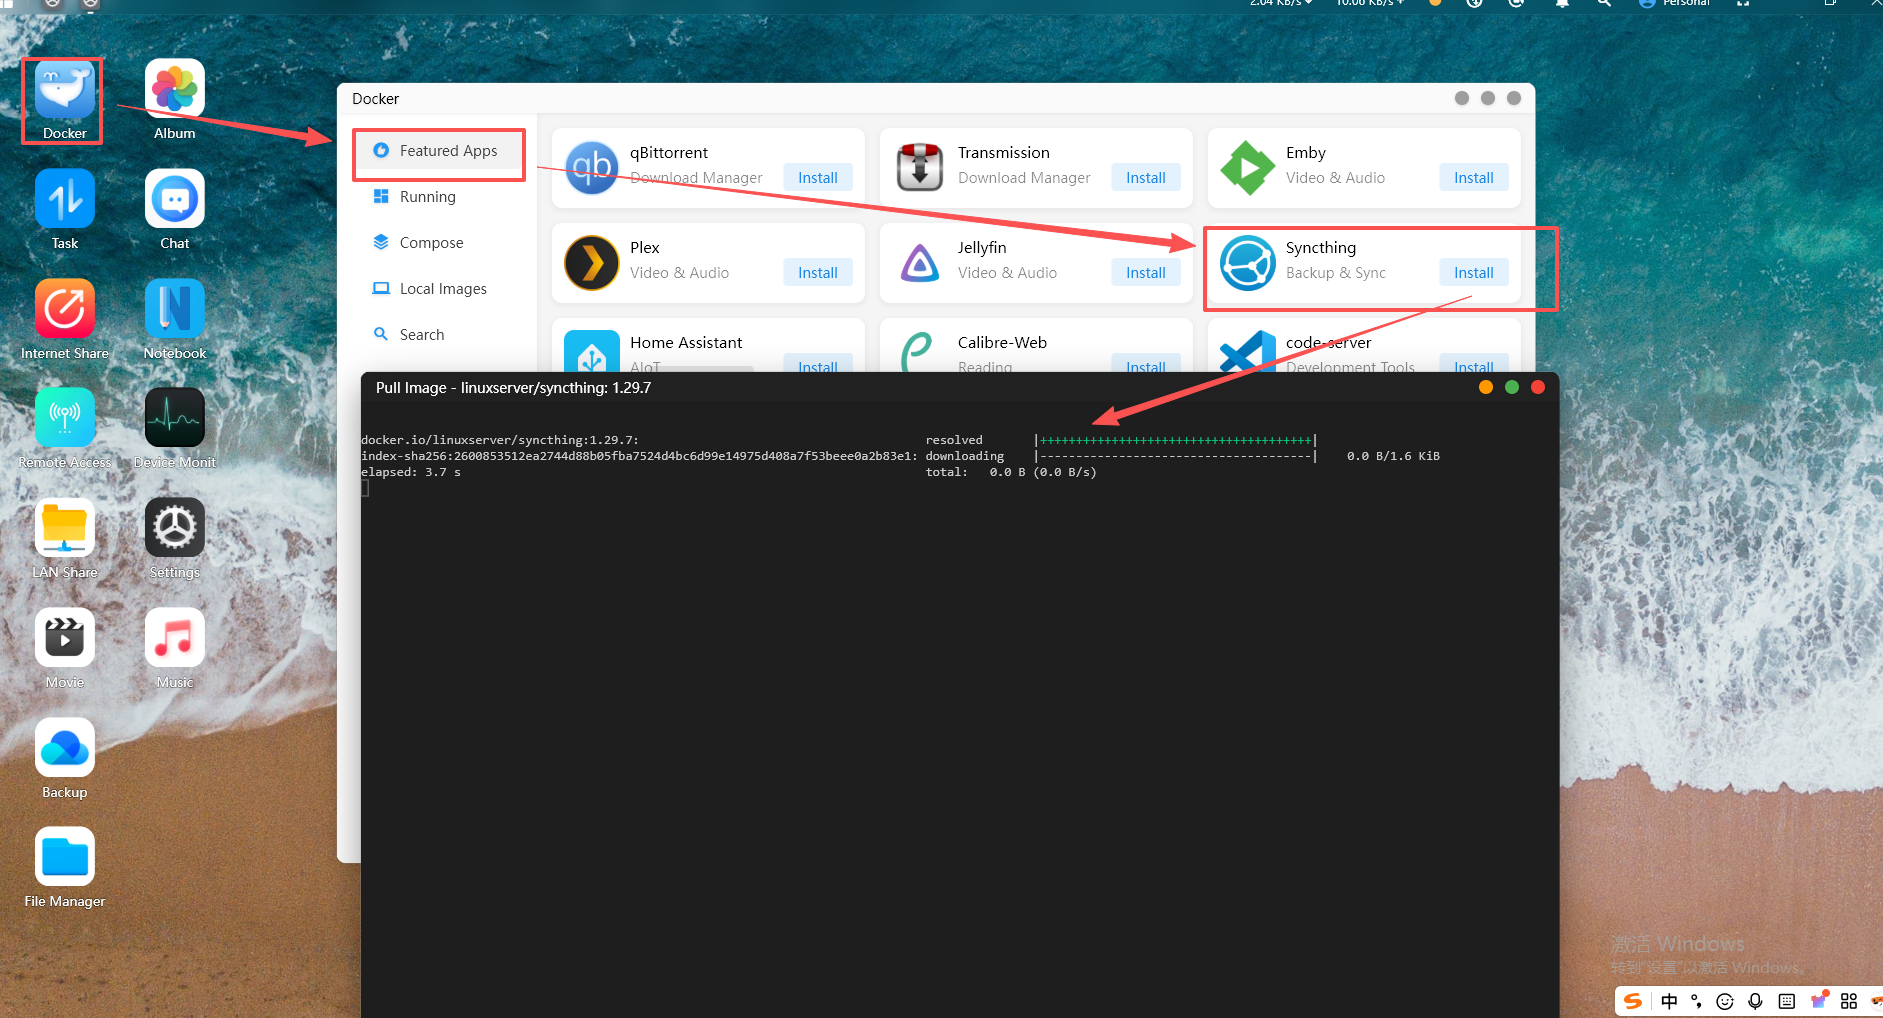
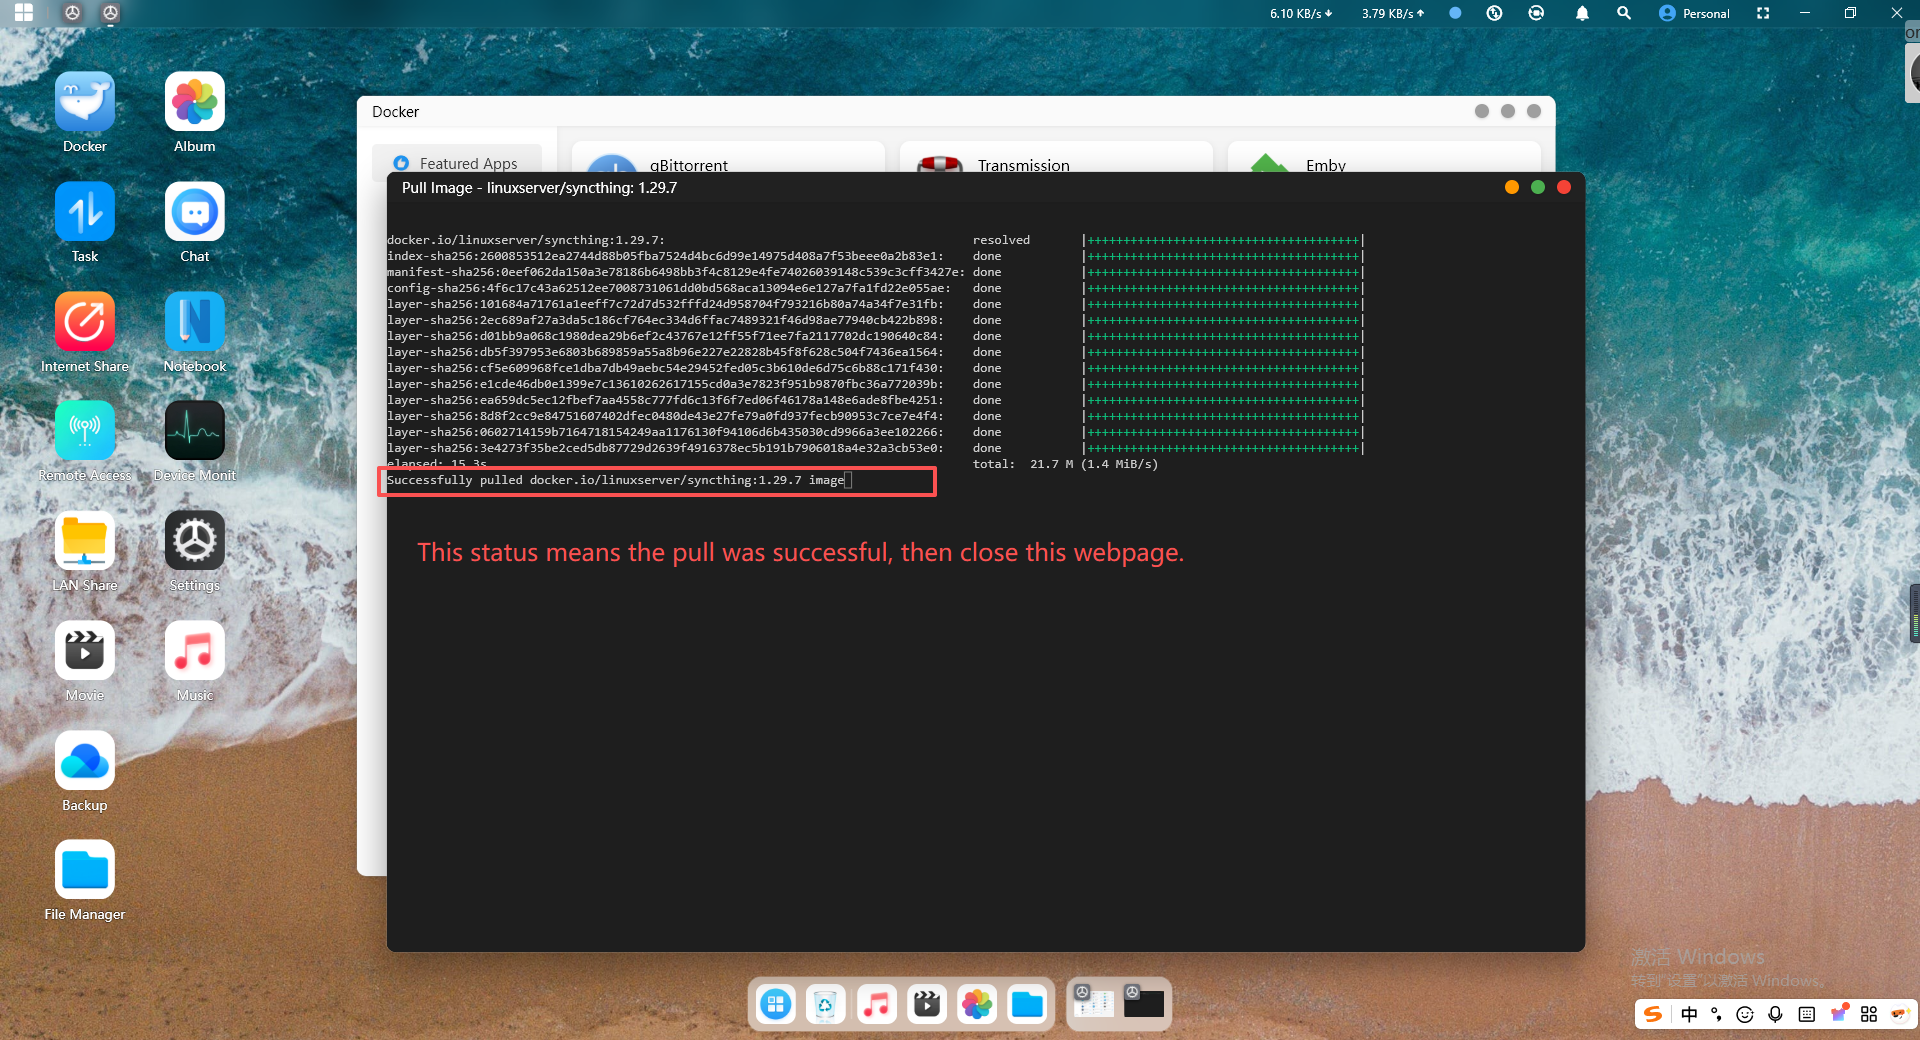
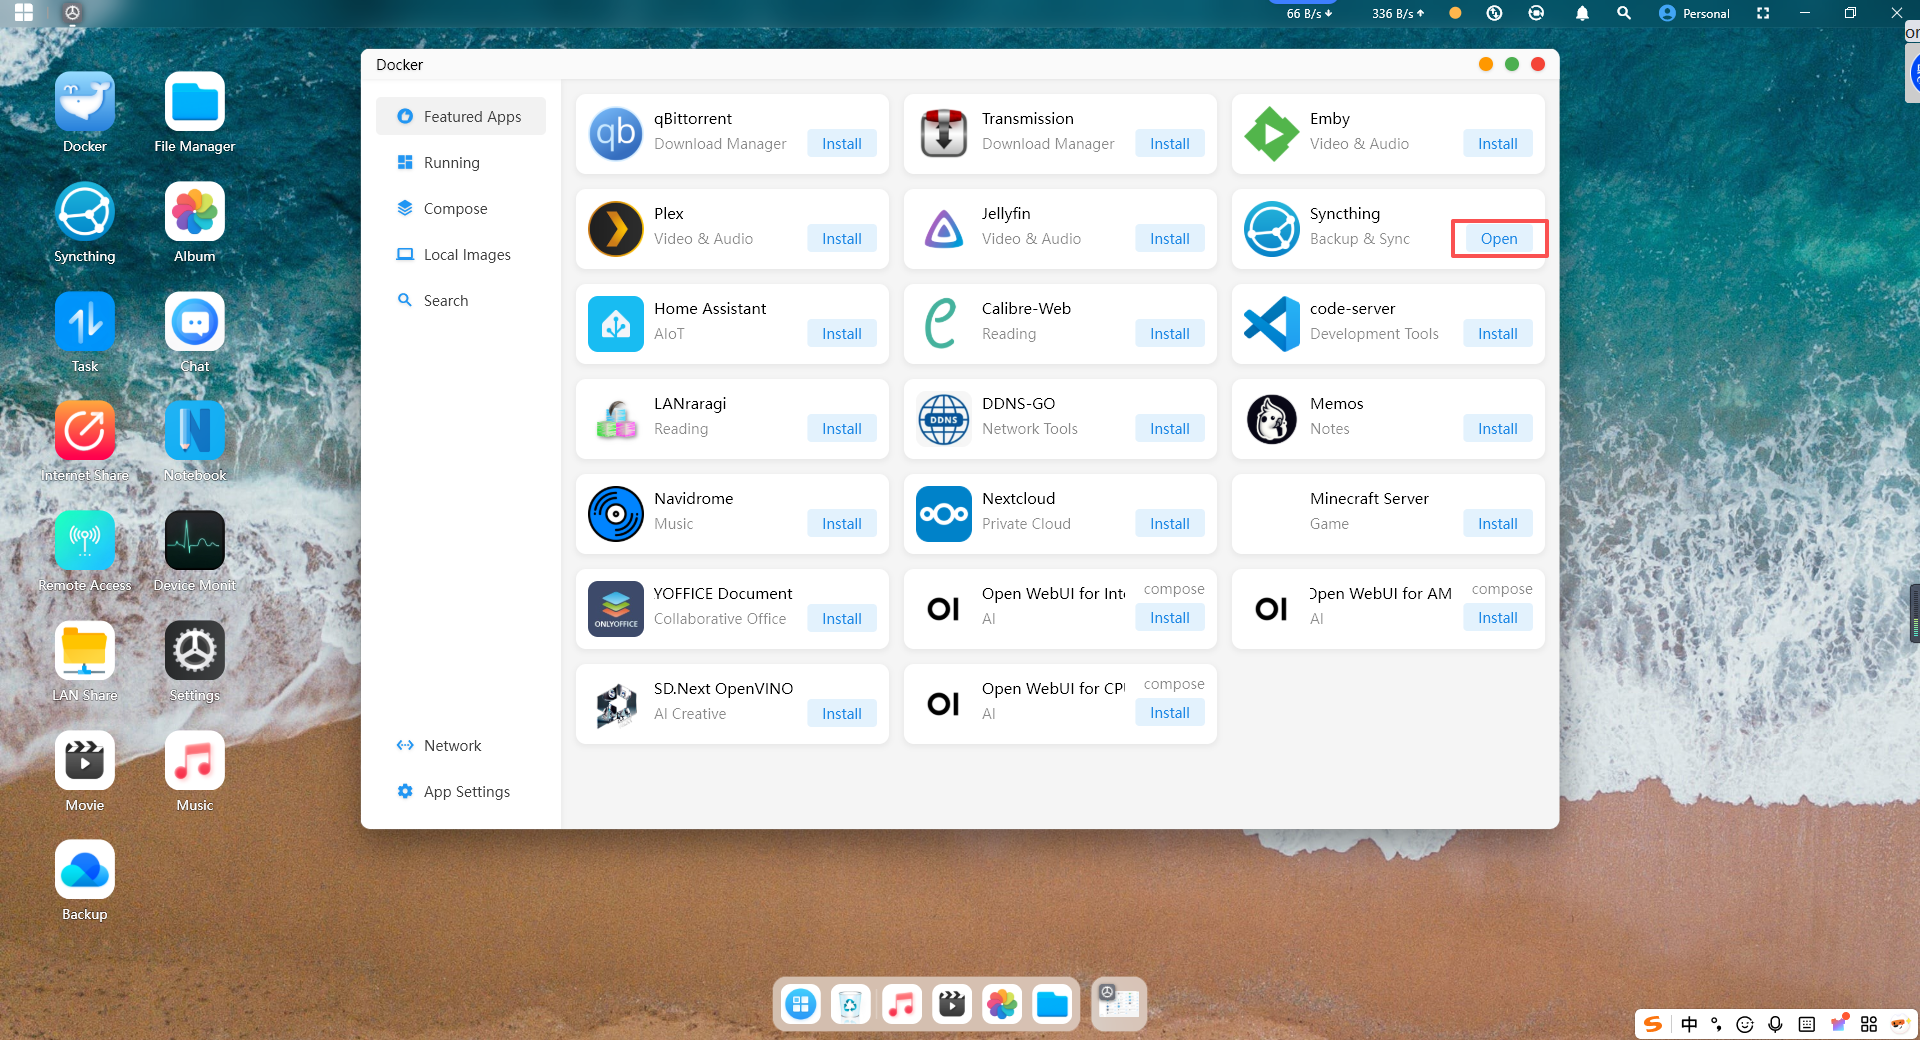
2.Click "Start", and after a successful launch, click "Open" to automatically redirect to the web page.
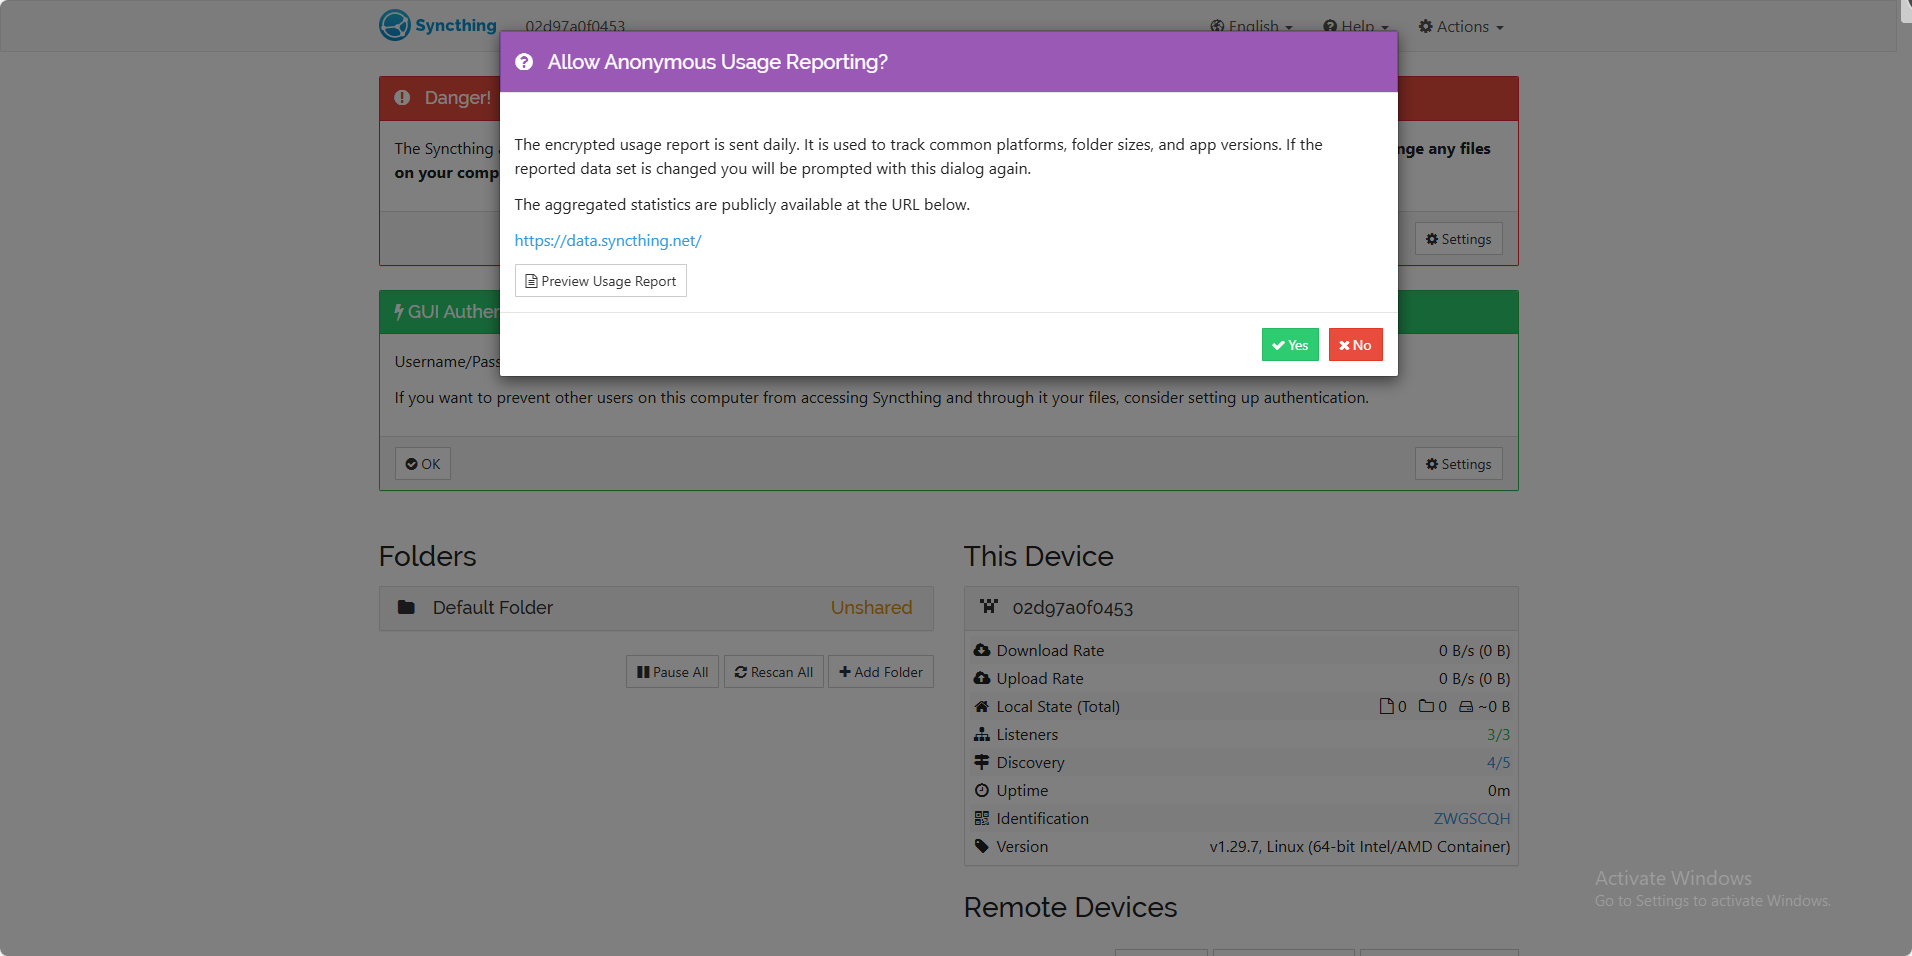
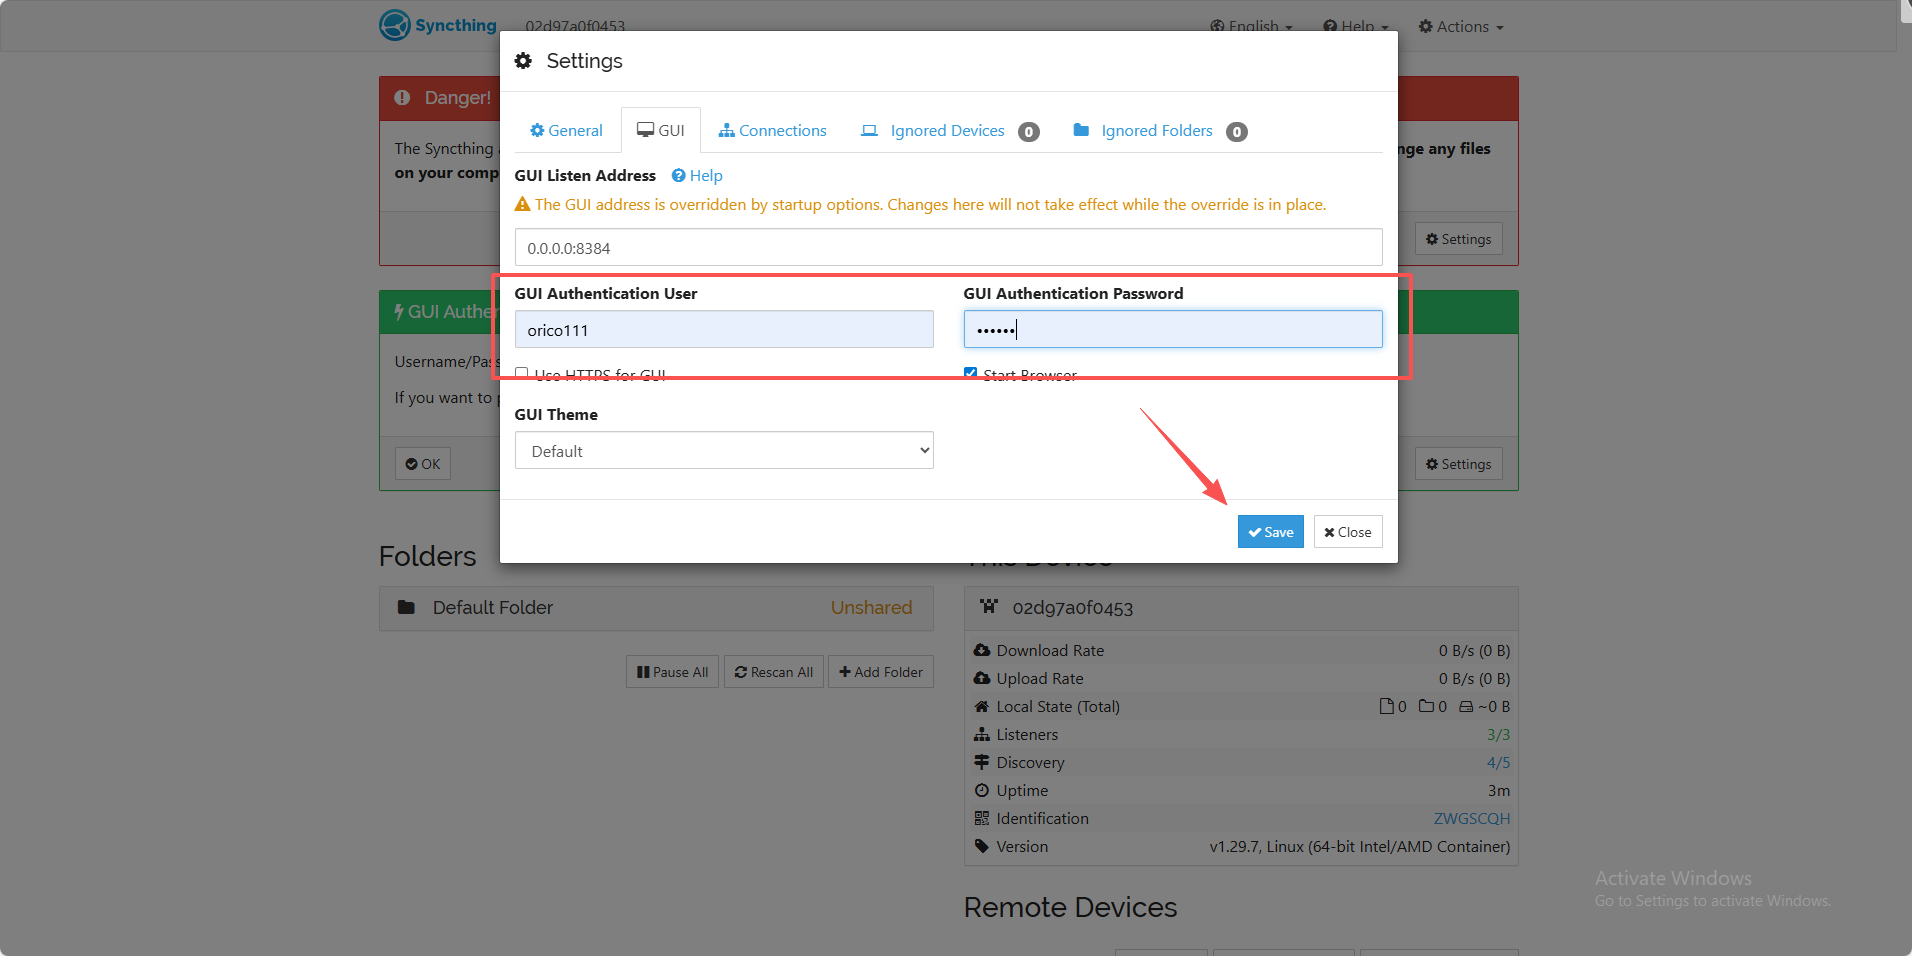
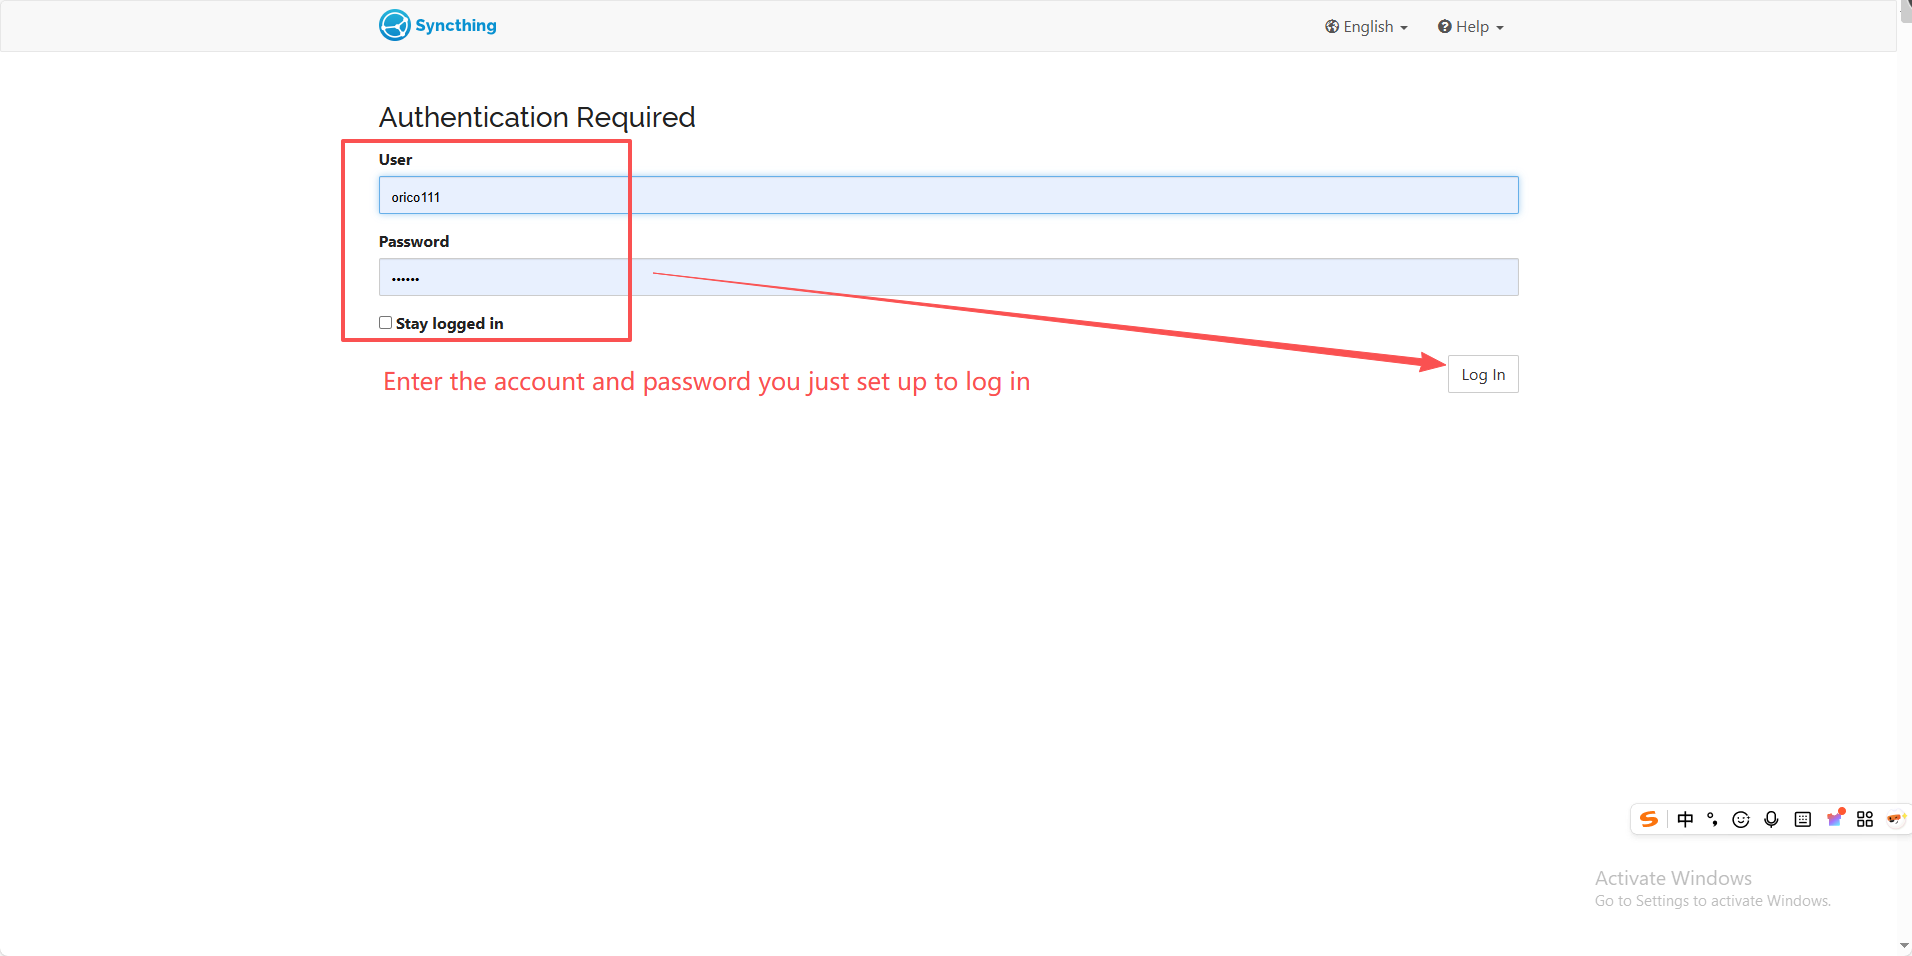
3.For security purposes, it is recommended to set a username and password for login. Click Settings -> GUI, enter the username and password for the graphical management interface on the page, and click "Save" to apply the changes.
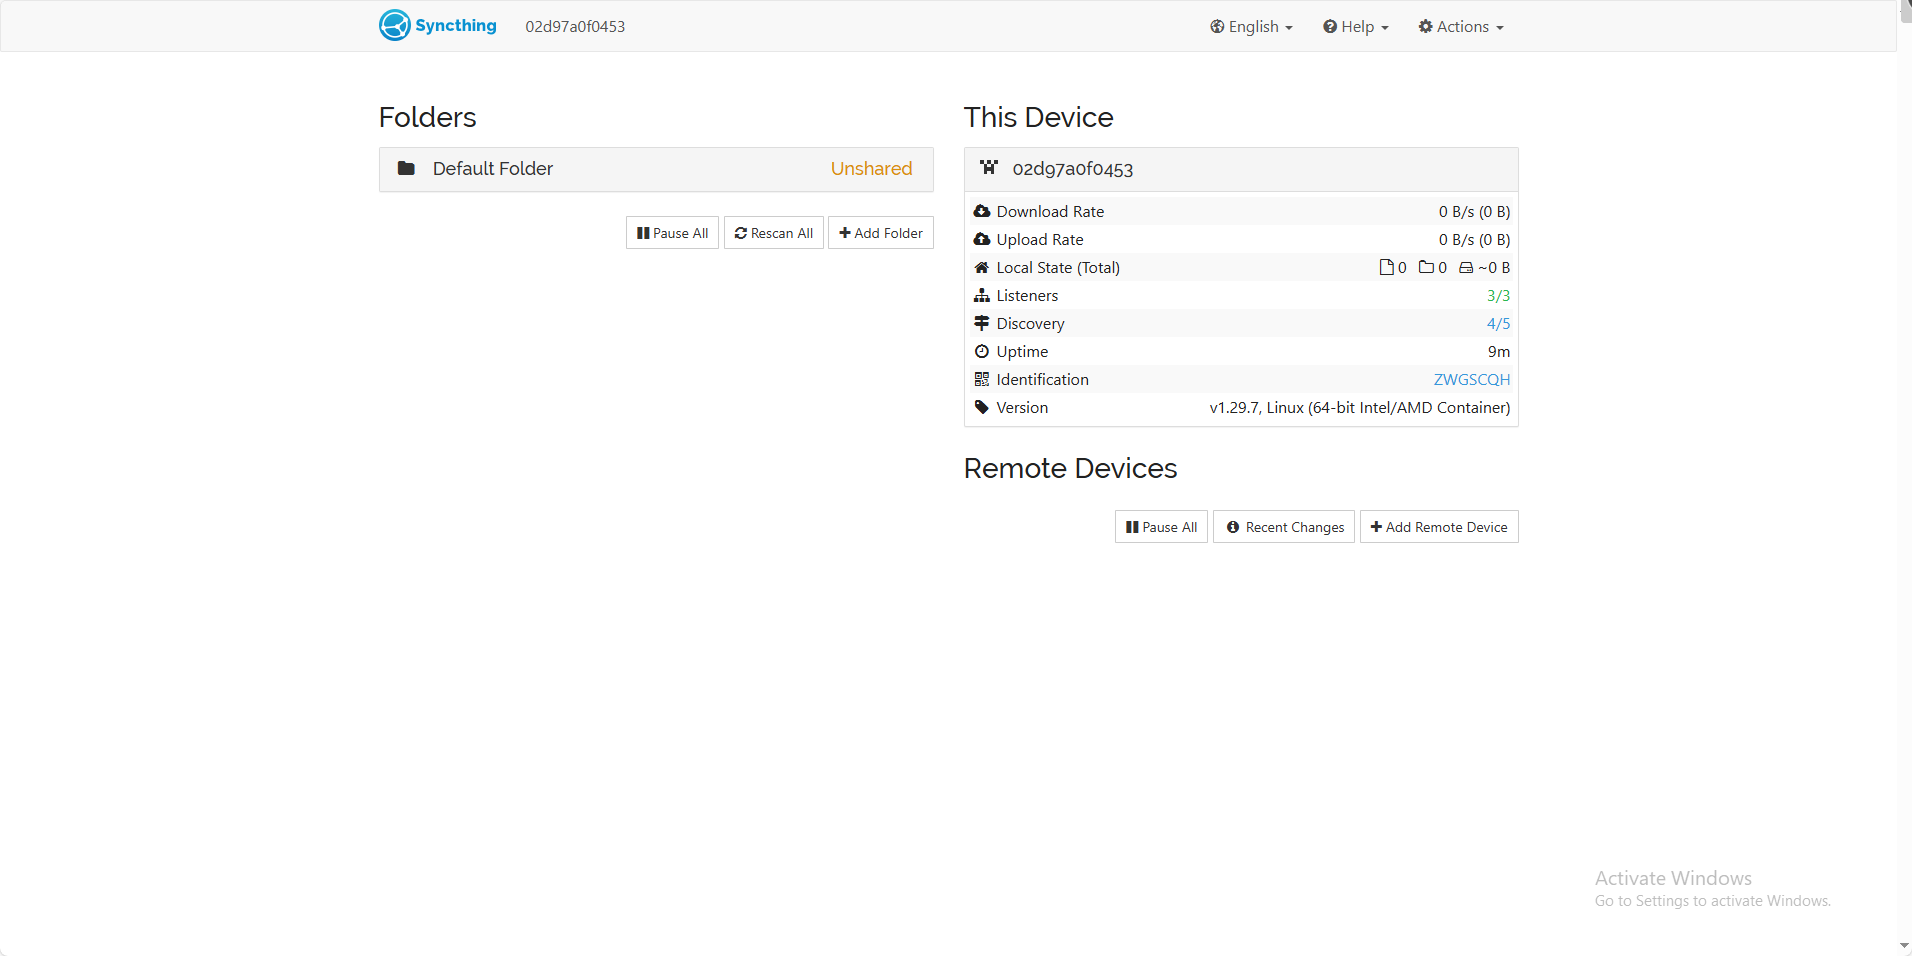
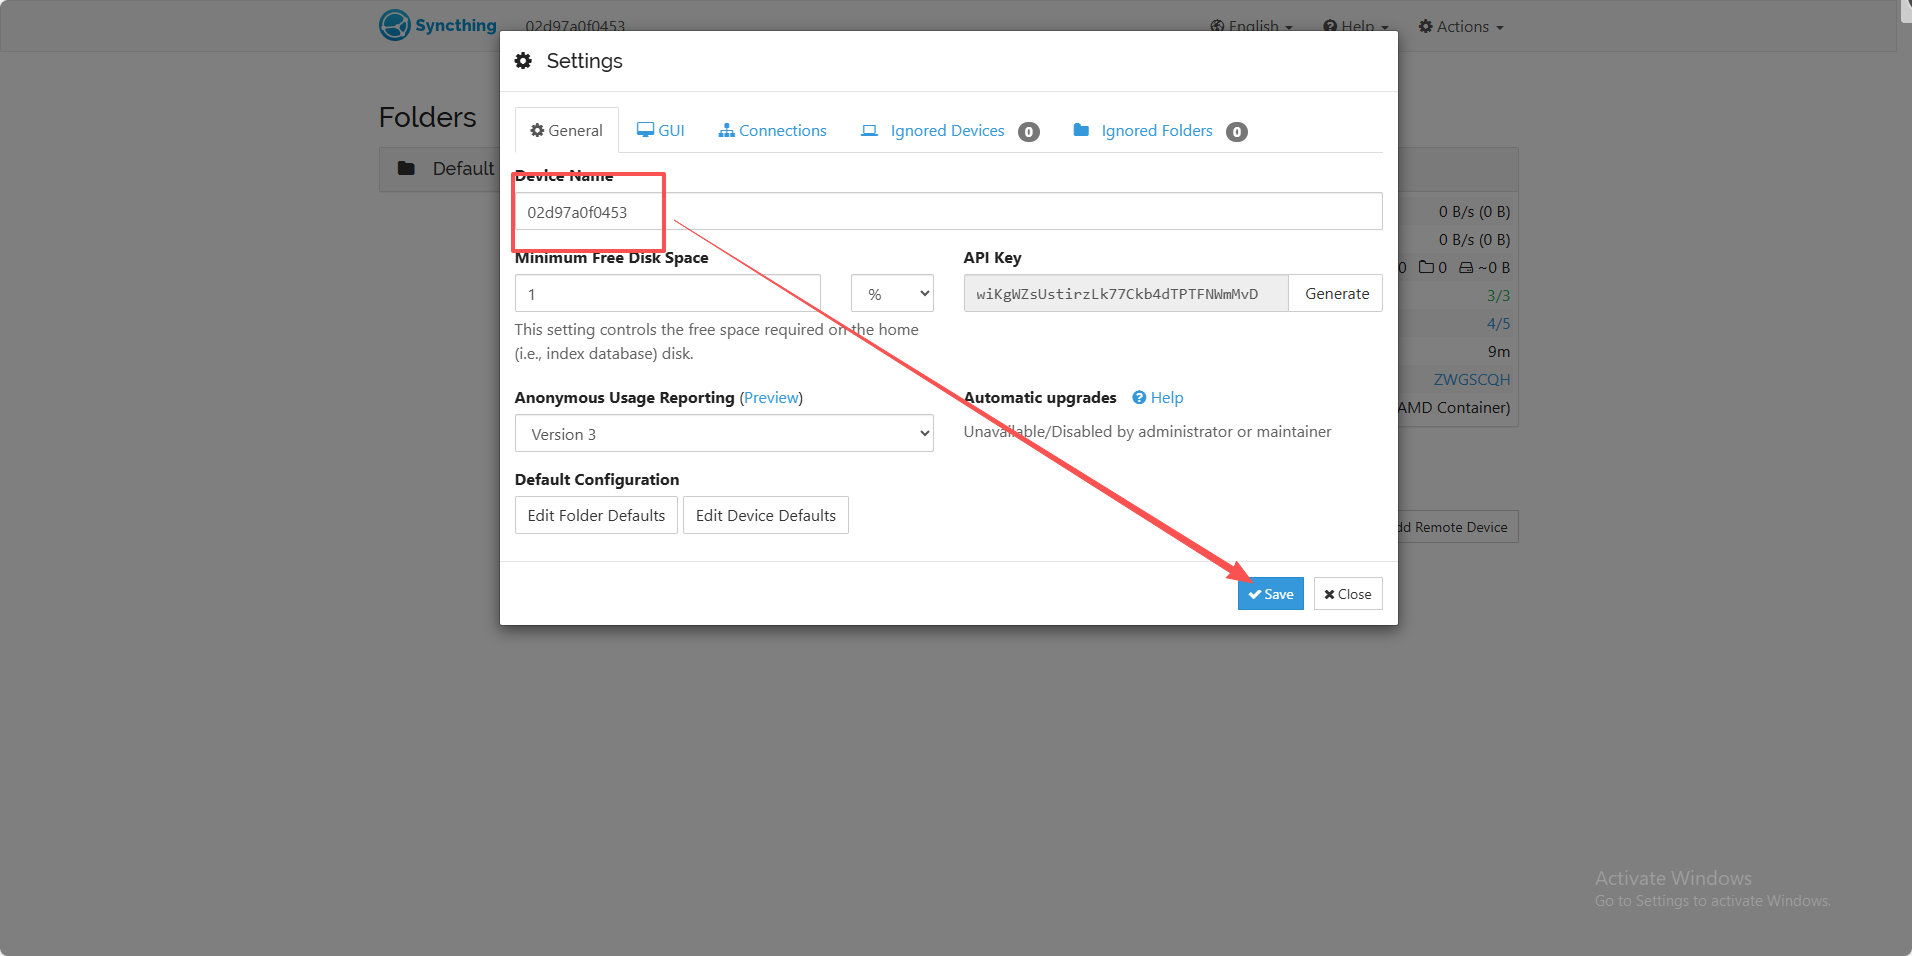
4.If needed, you can modify the device name. Click Actions in the upper-right corner, then go to the Settings page.
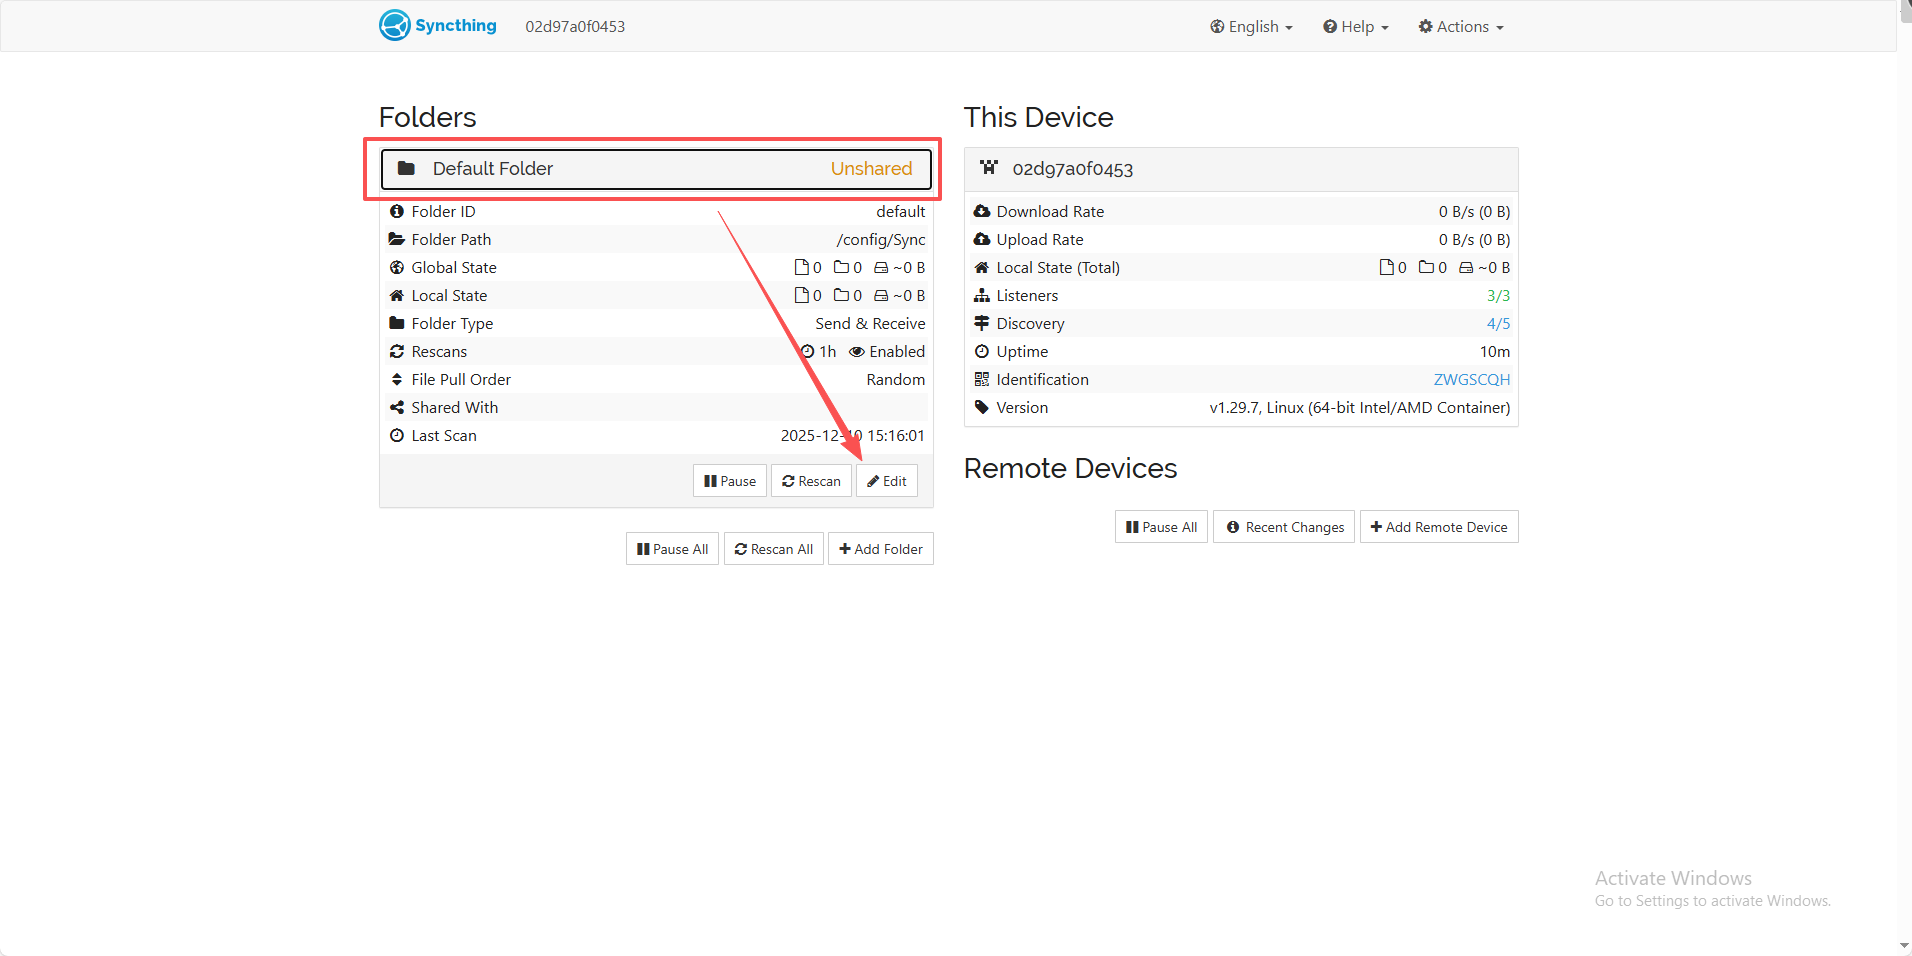
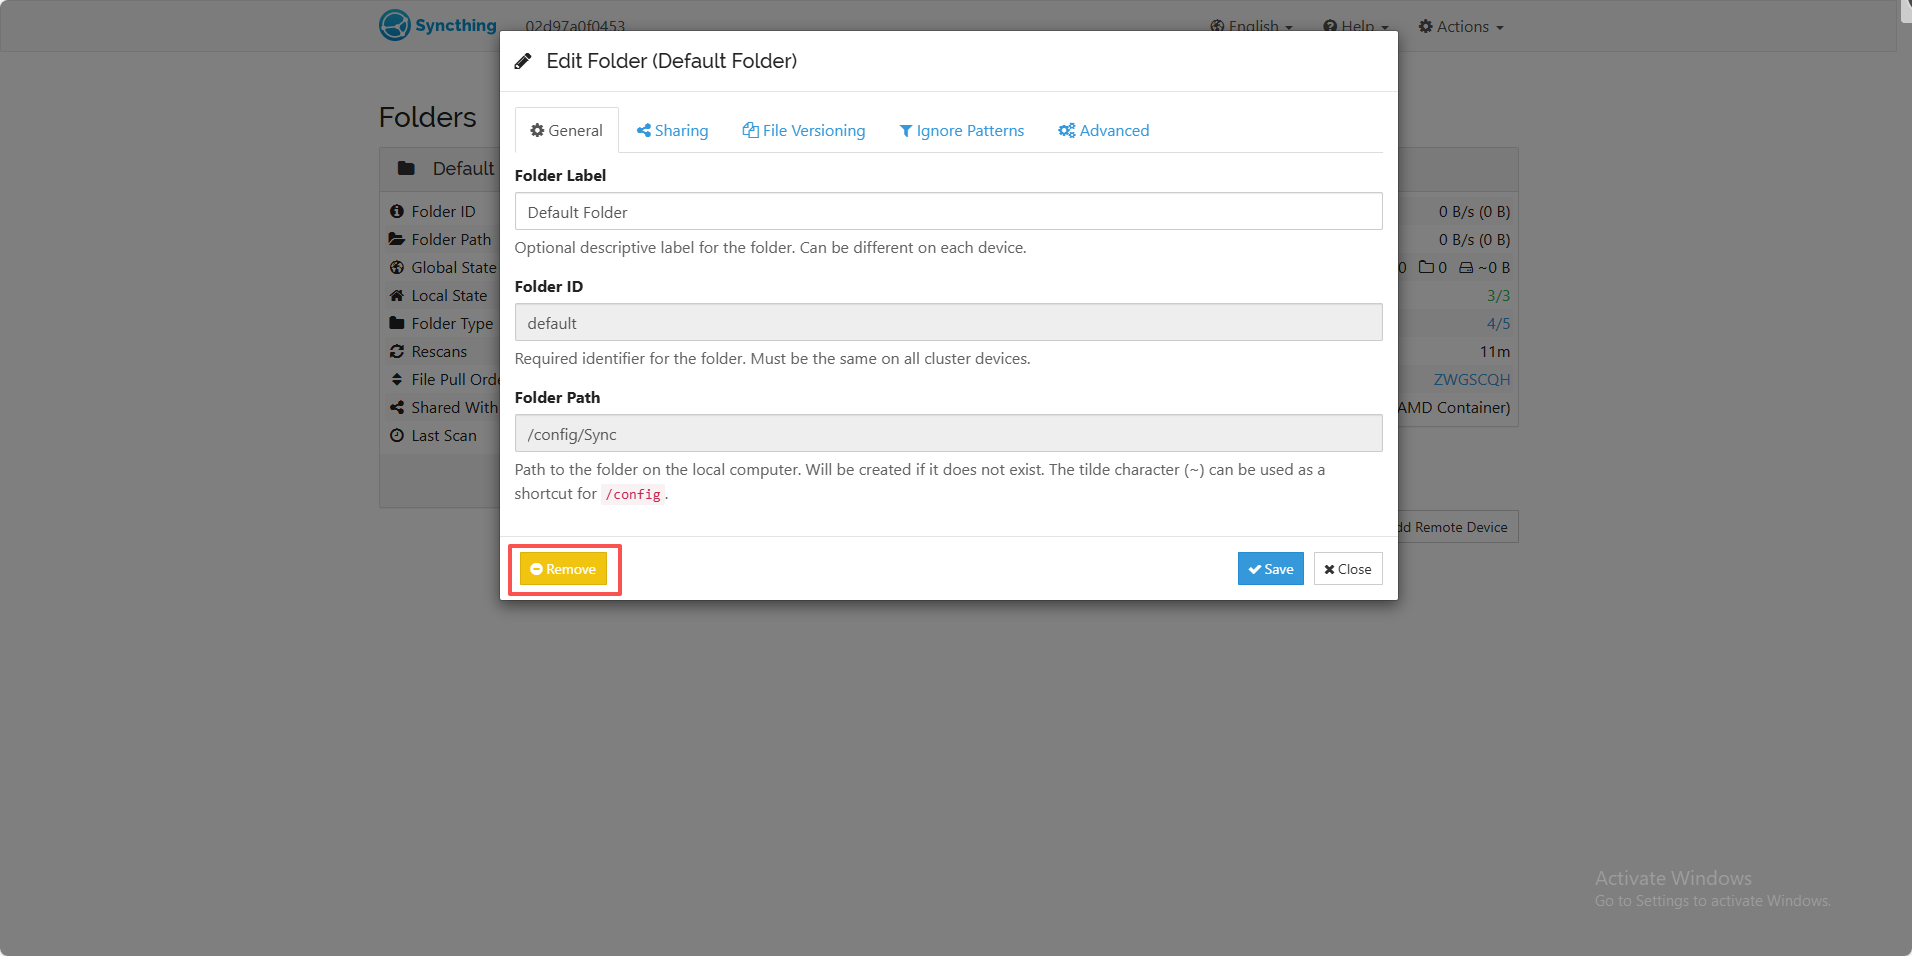
5.The default folder template can also be removed (other folders can be removed using the same method).
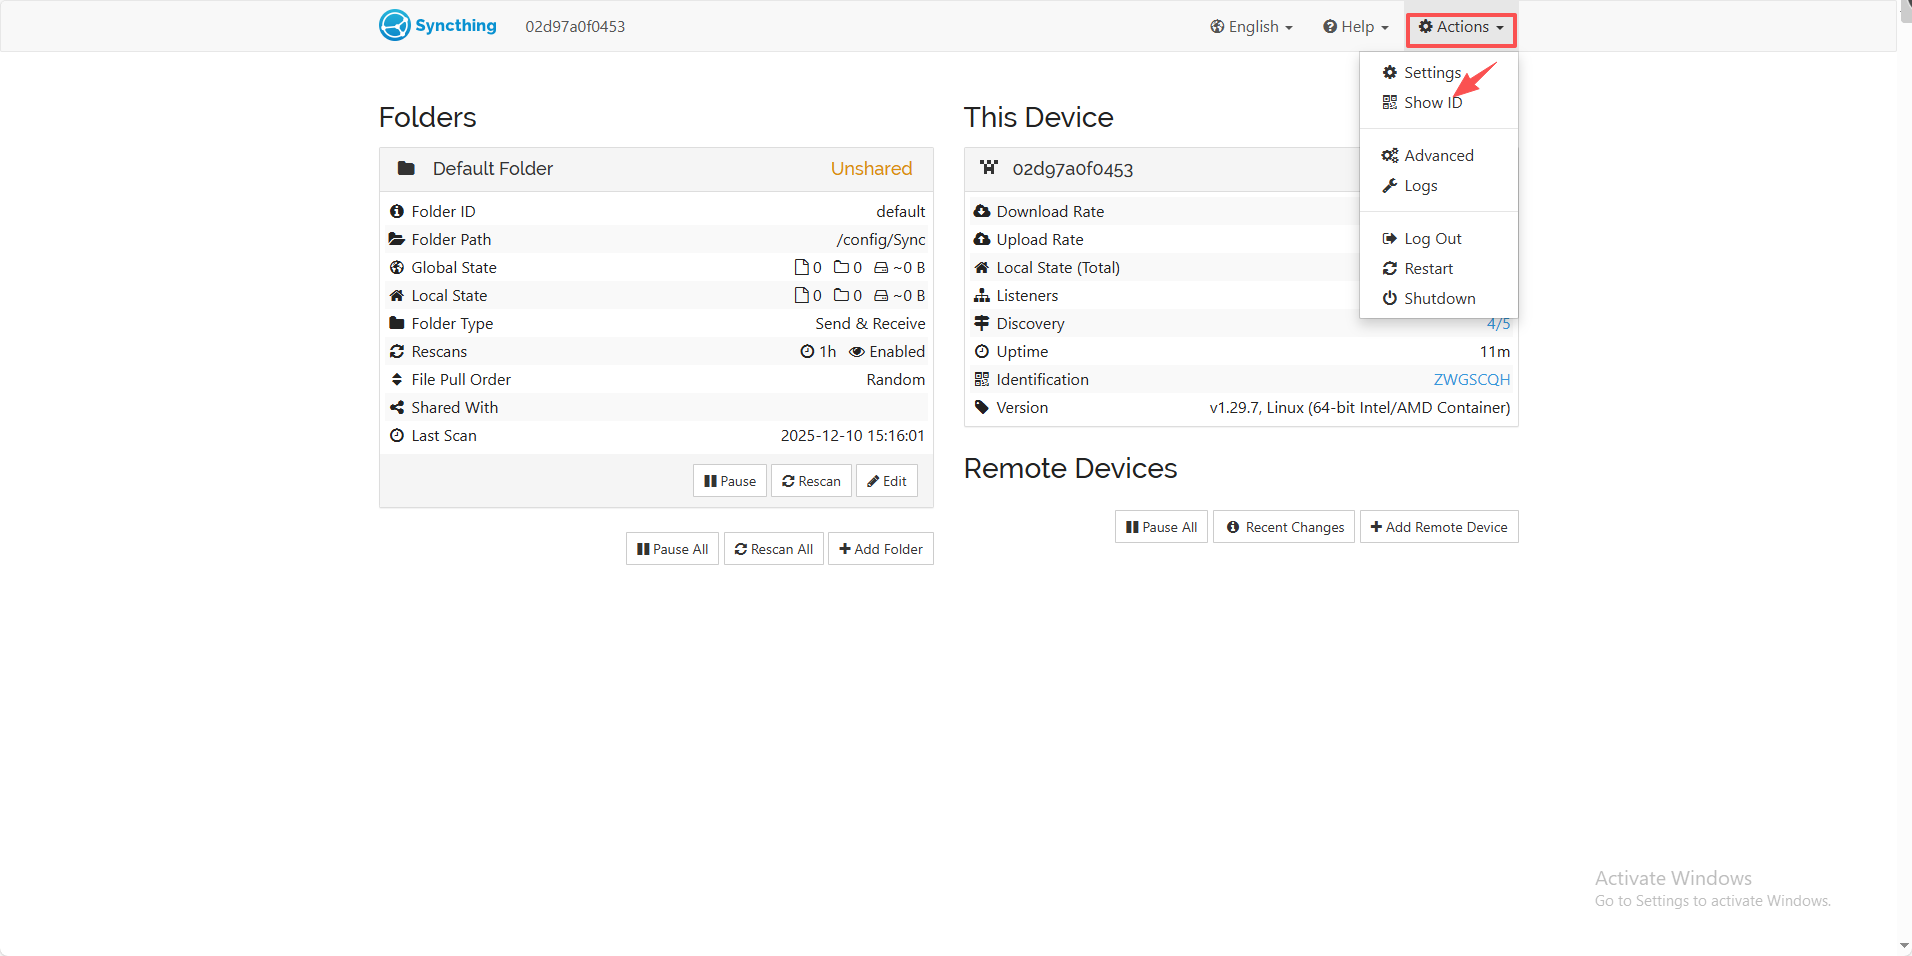
6.View or copy the local device Syncthing ID.
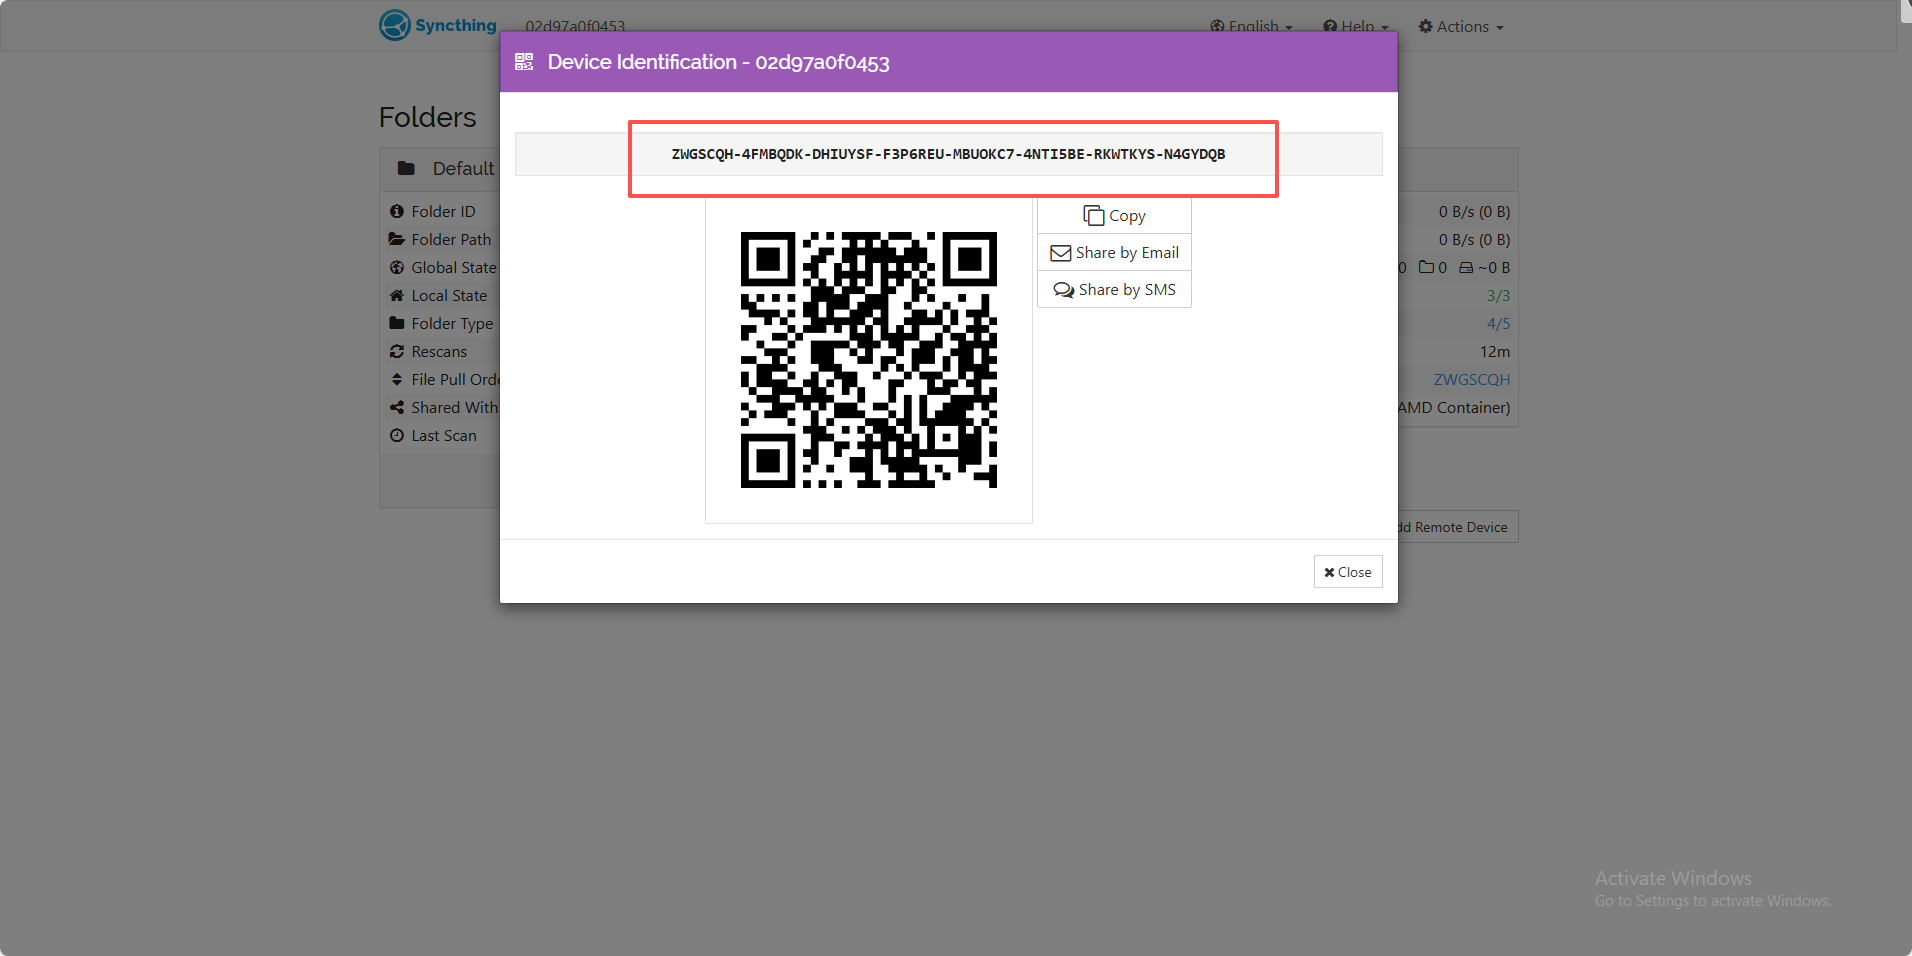
(The following steps use NAS Device A and NAS Device B as an example for real-time file/folder synchronization.)
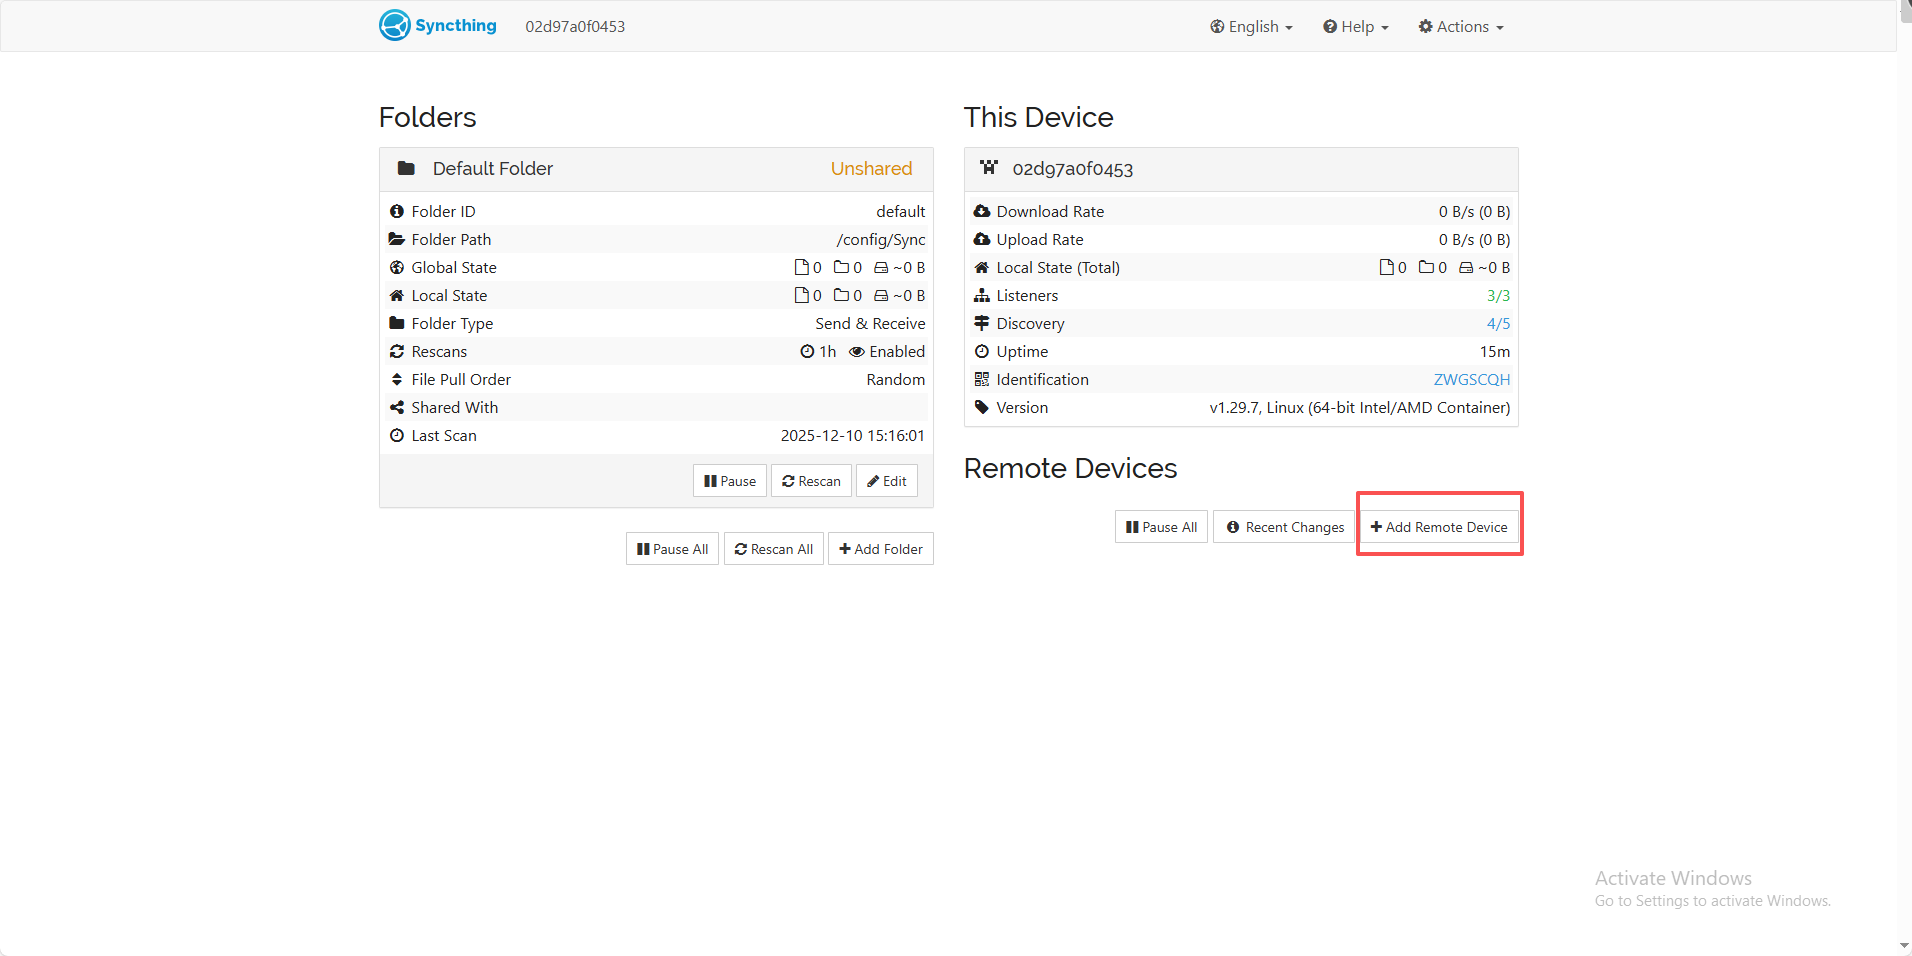
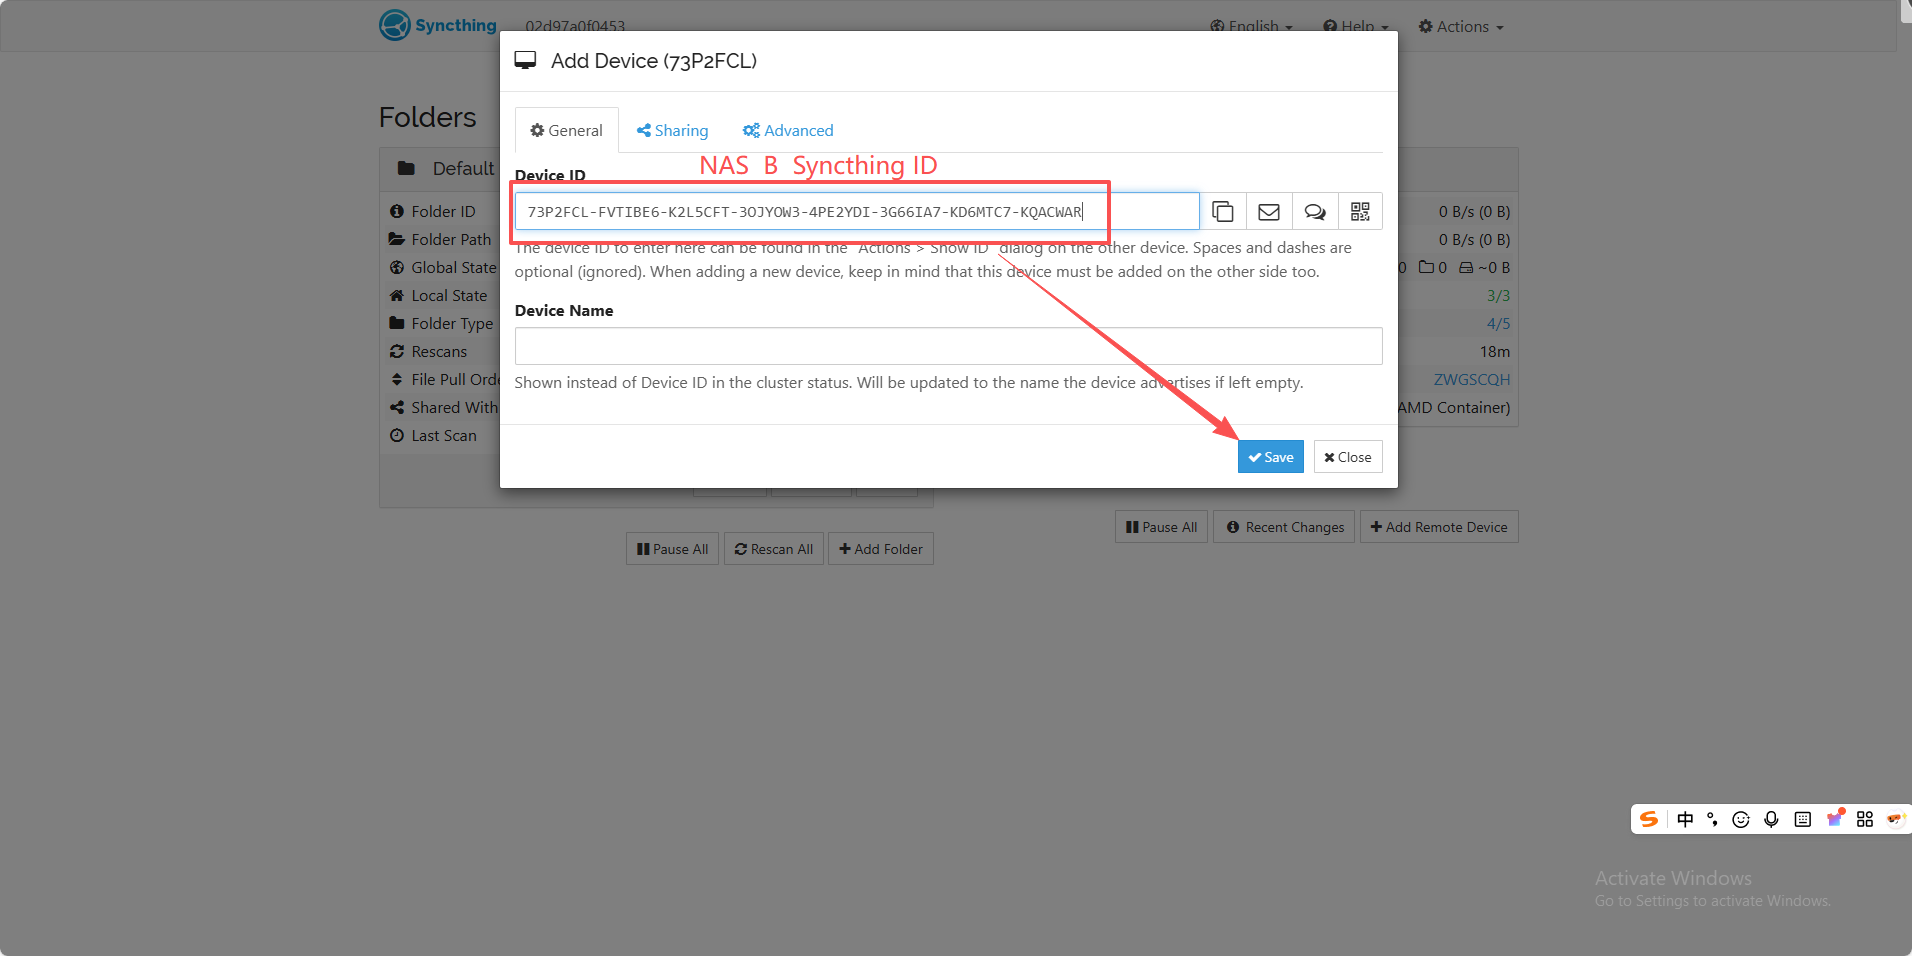
2.After saving, the page will receive a notification to add a new device. Click "Add Device" and then click "Save". Similarly, the Syncthing web page deployed on NAS Device B will also receive a notification to add a new device. After accepting it on the page, the two devices will be able to synchronize files and folders.
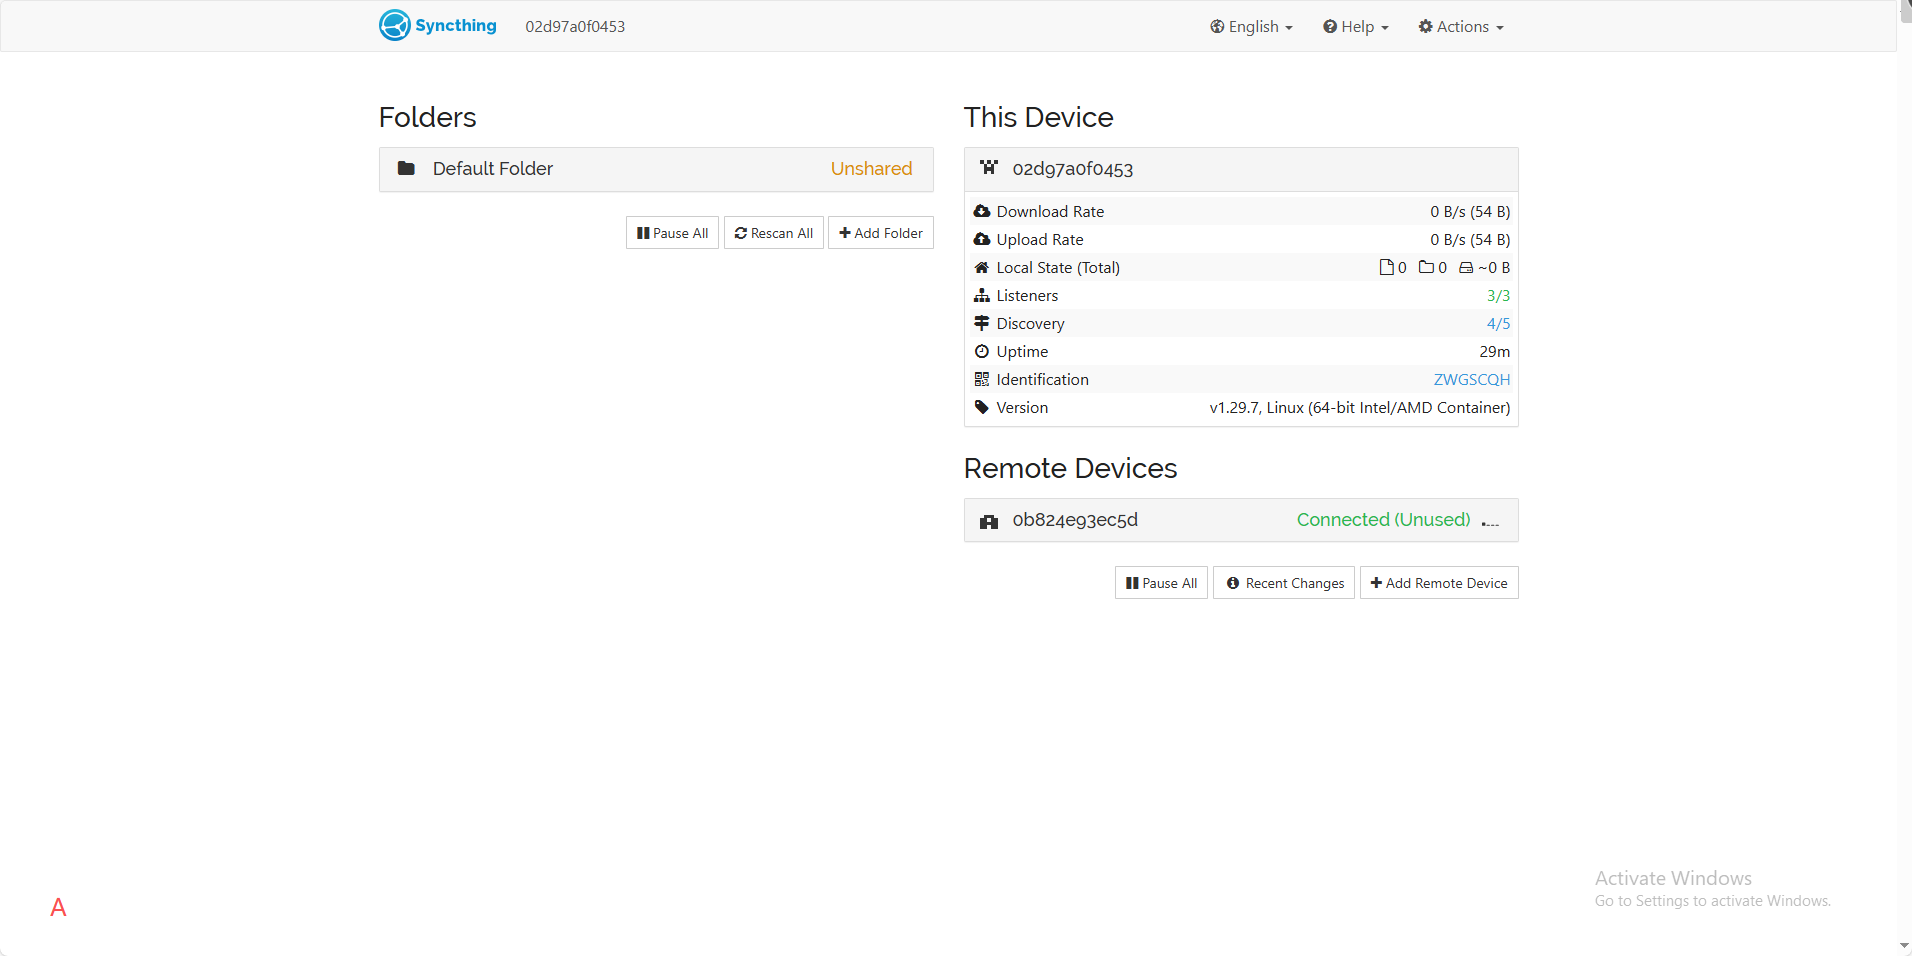
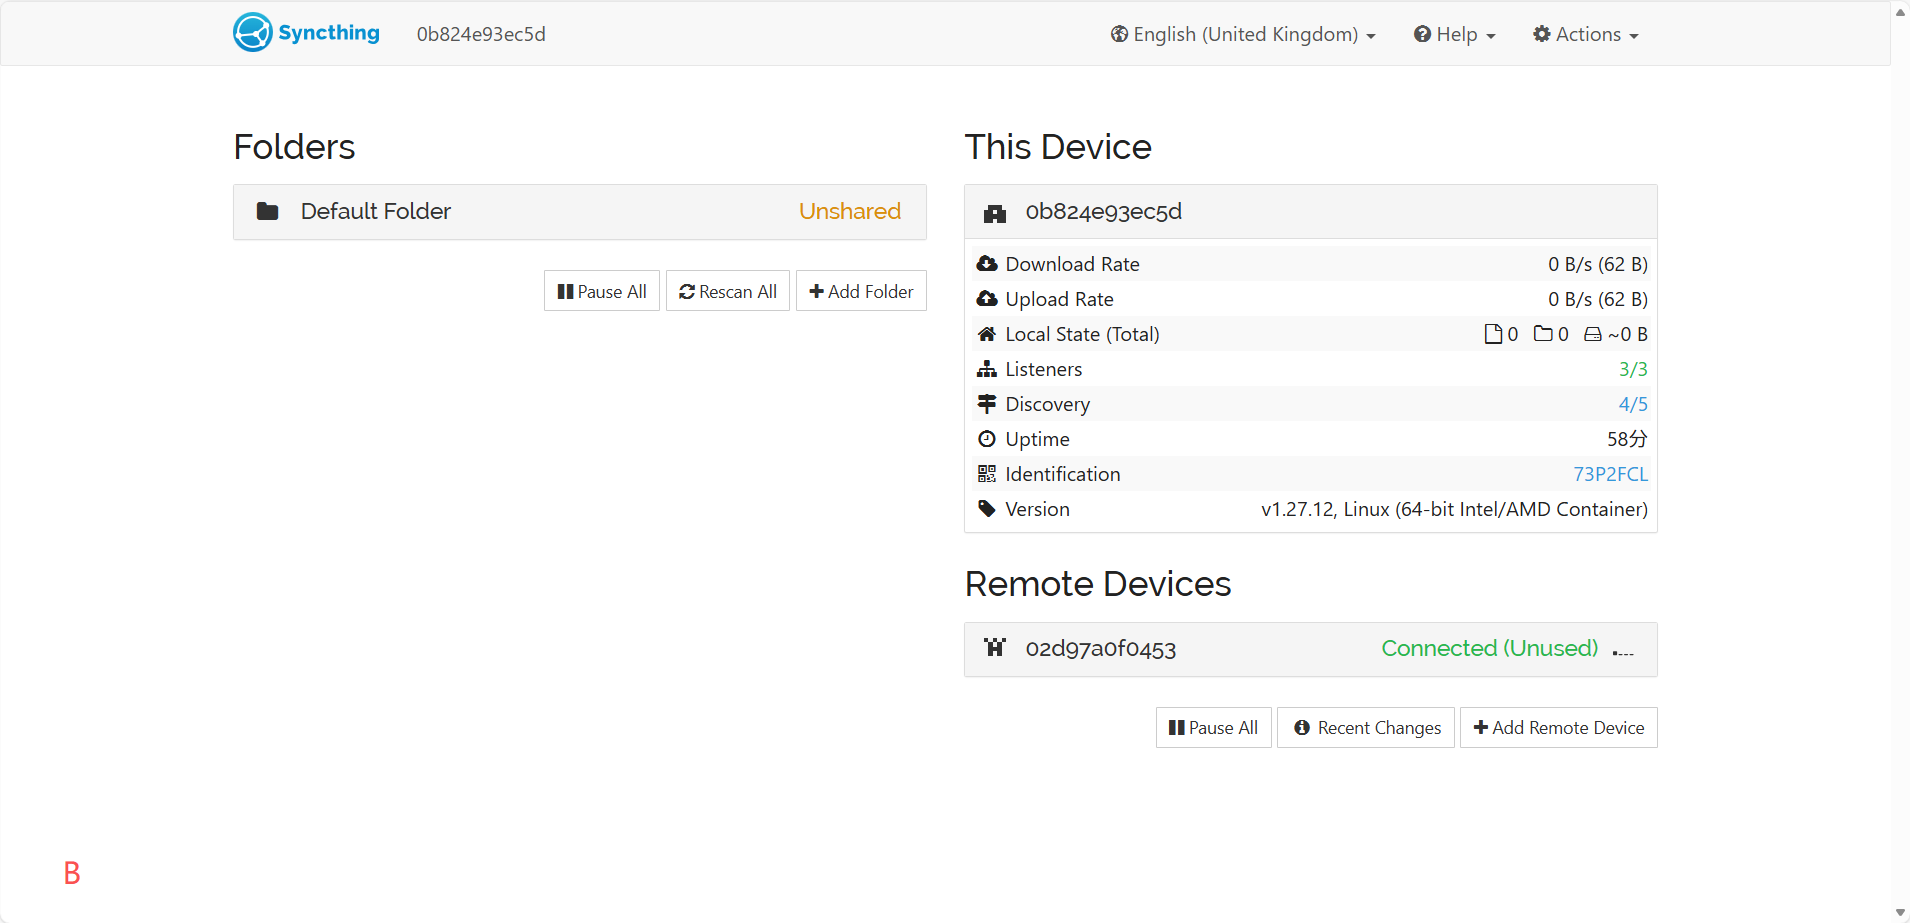
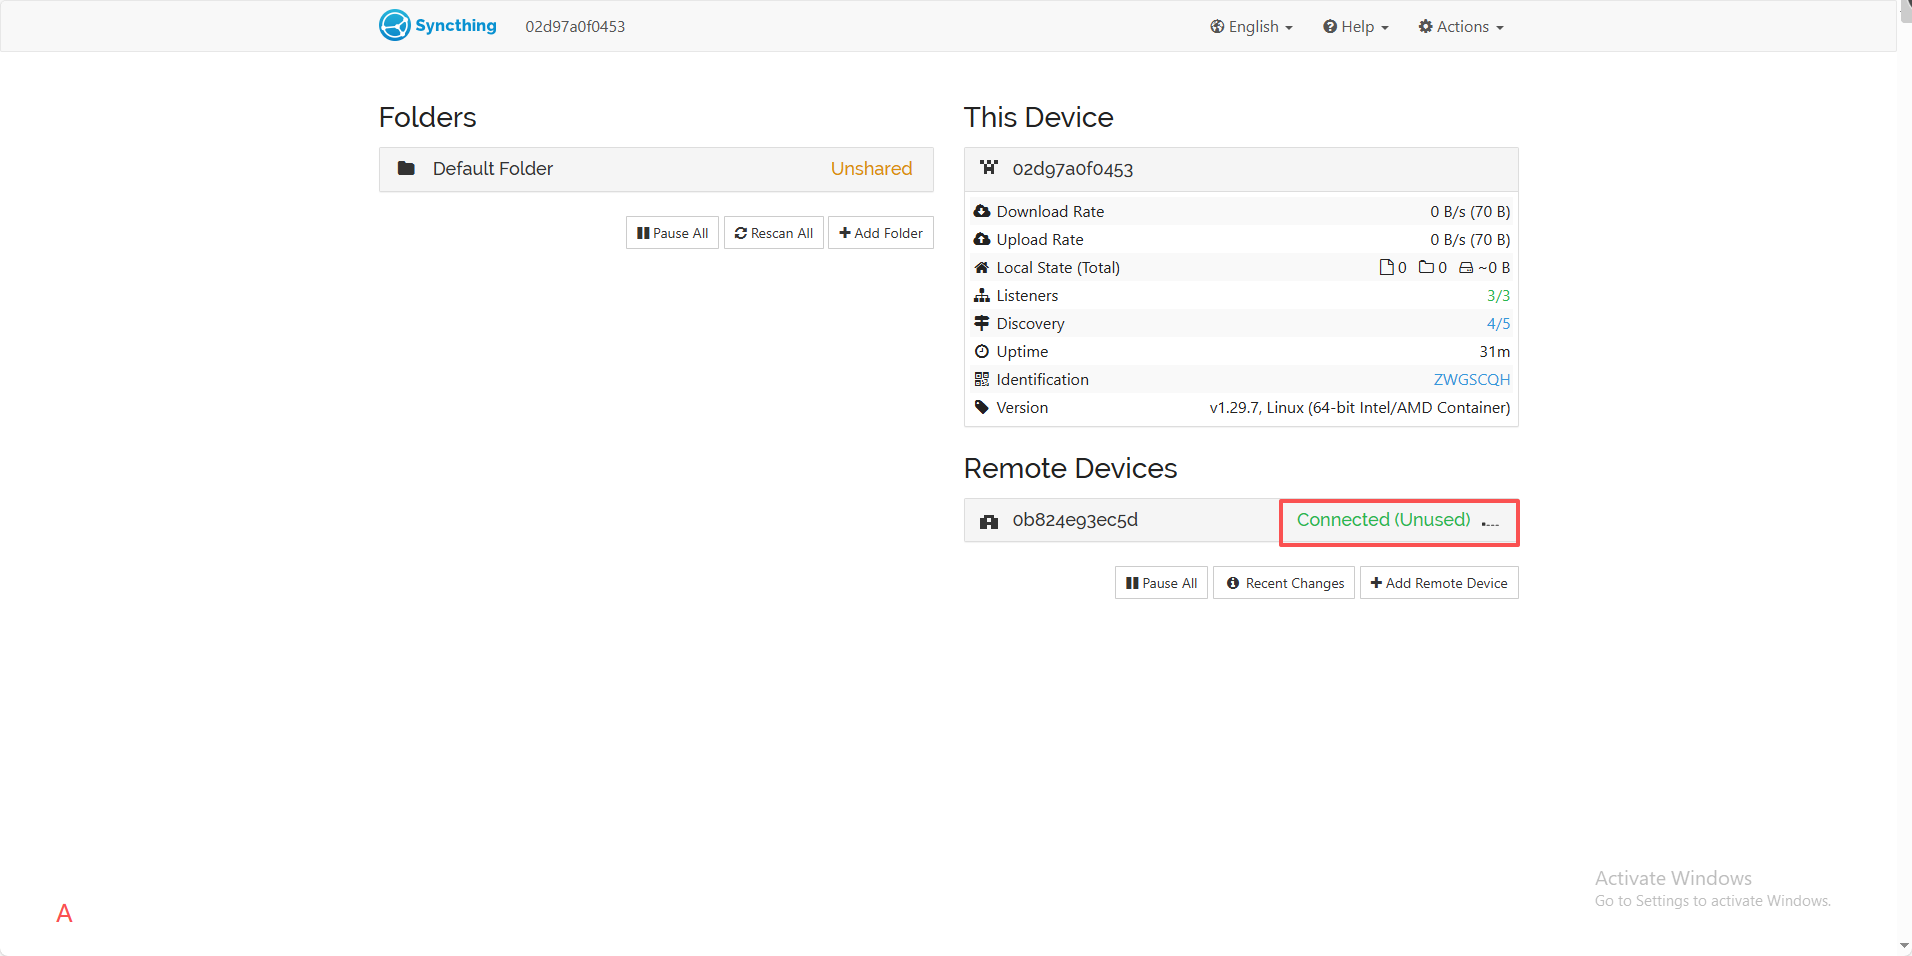
After adding the device on the Syncthing web page of NAS Device B as well, you can see that the remote device on the Syncthing web page of NAS Device A shows a "Connected" status.
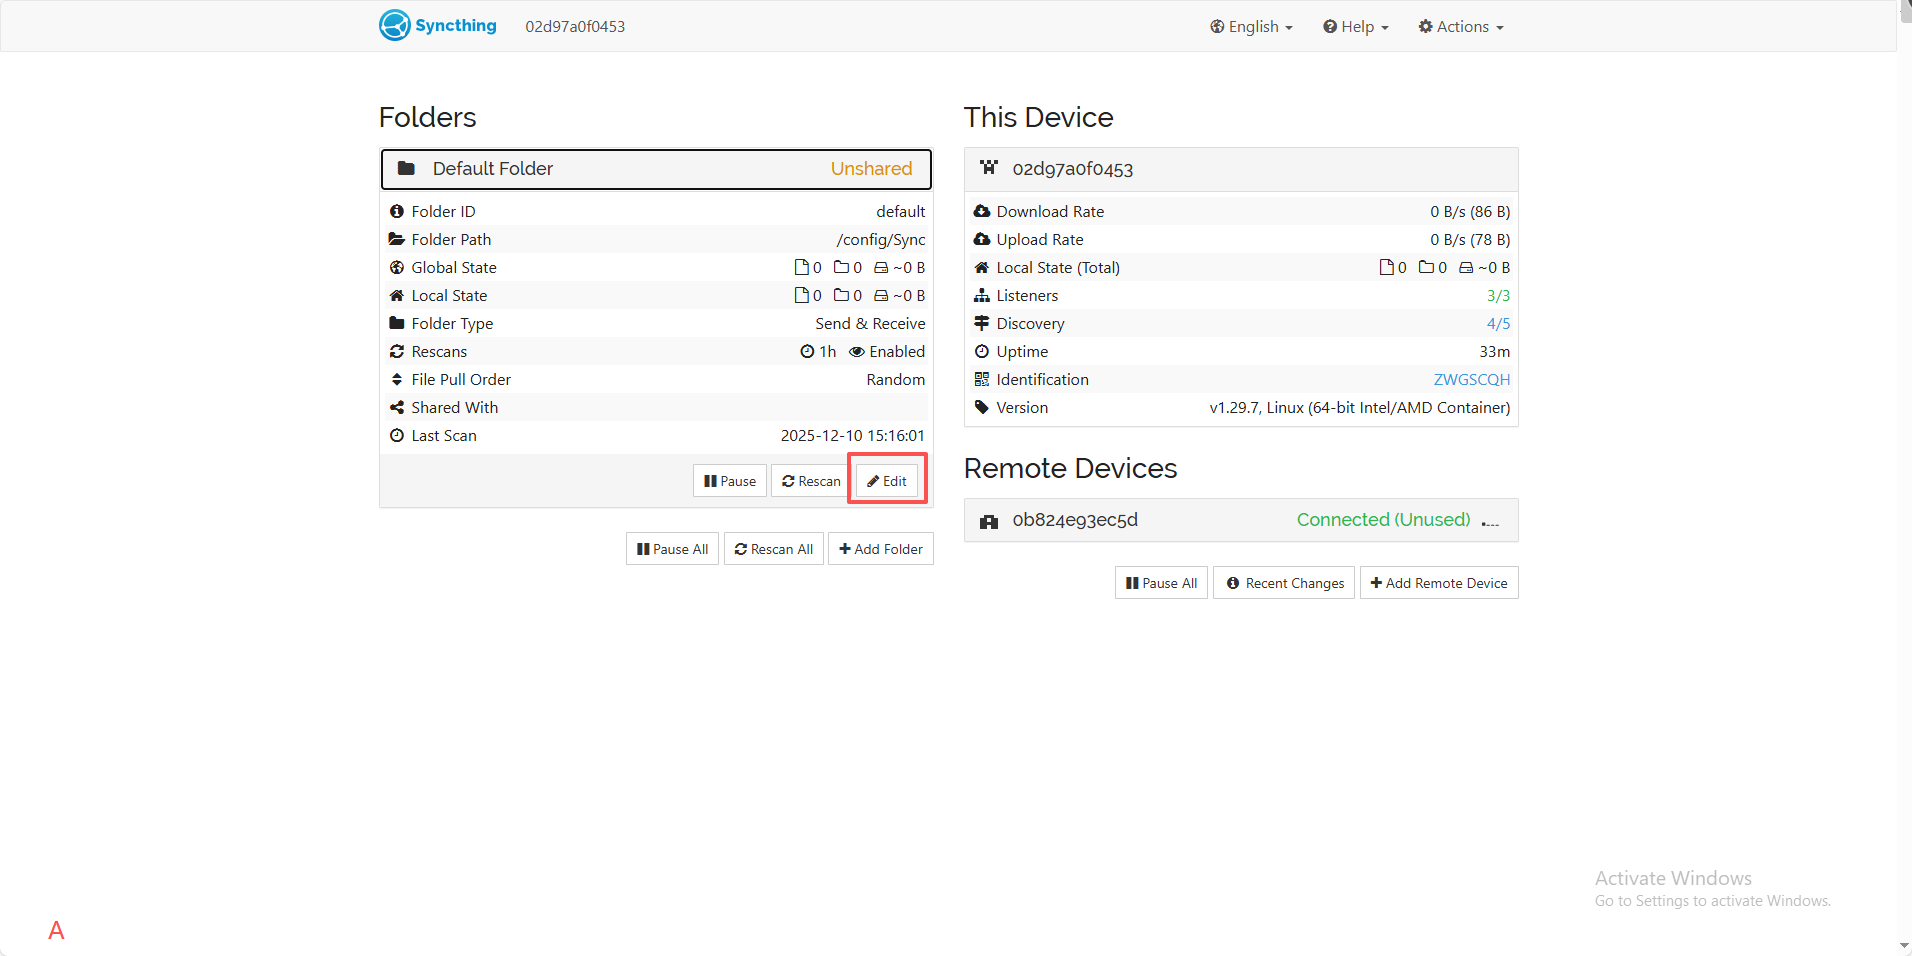
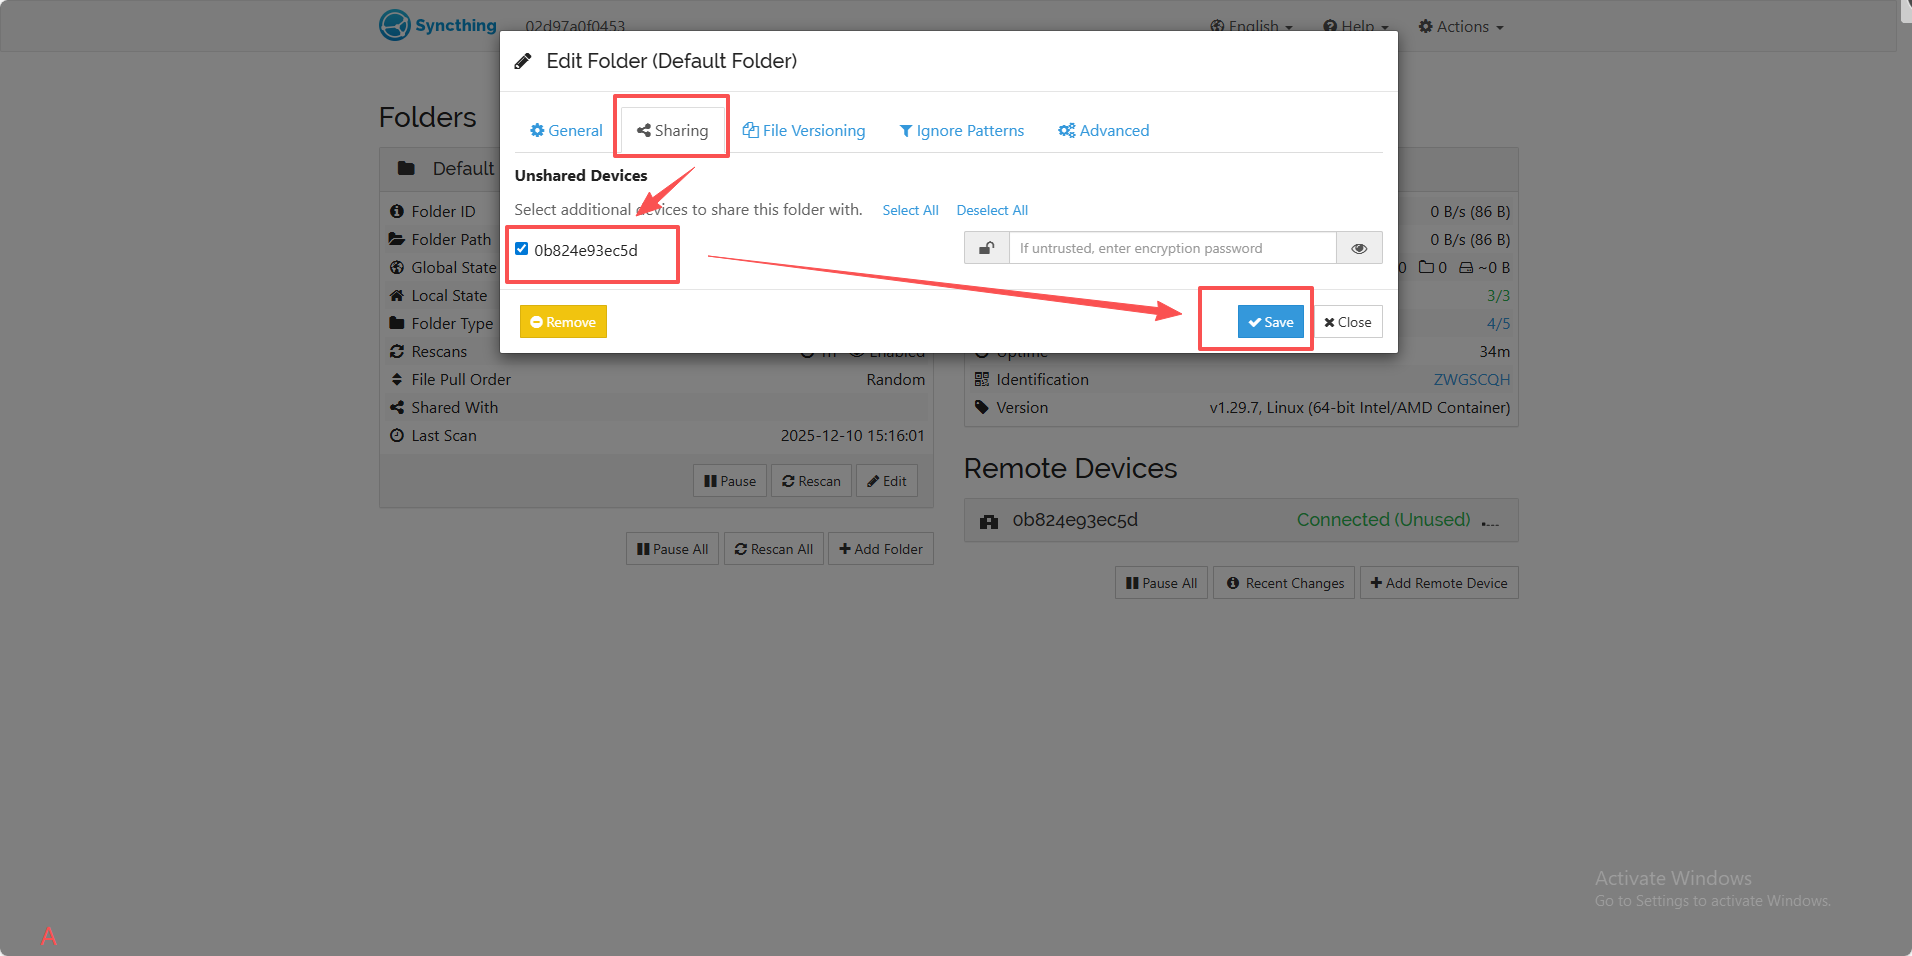
2.The Syncthing web page on NAS Device B will receive a notification to add a new folder. Click "Add" to proceed.
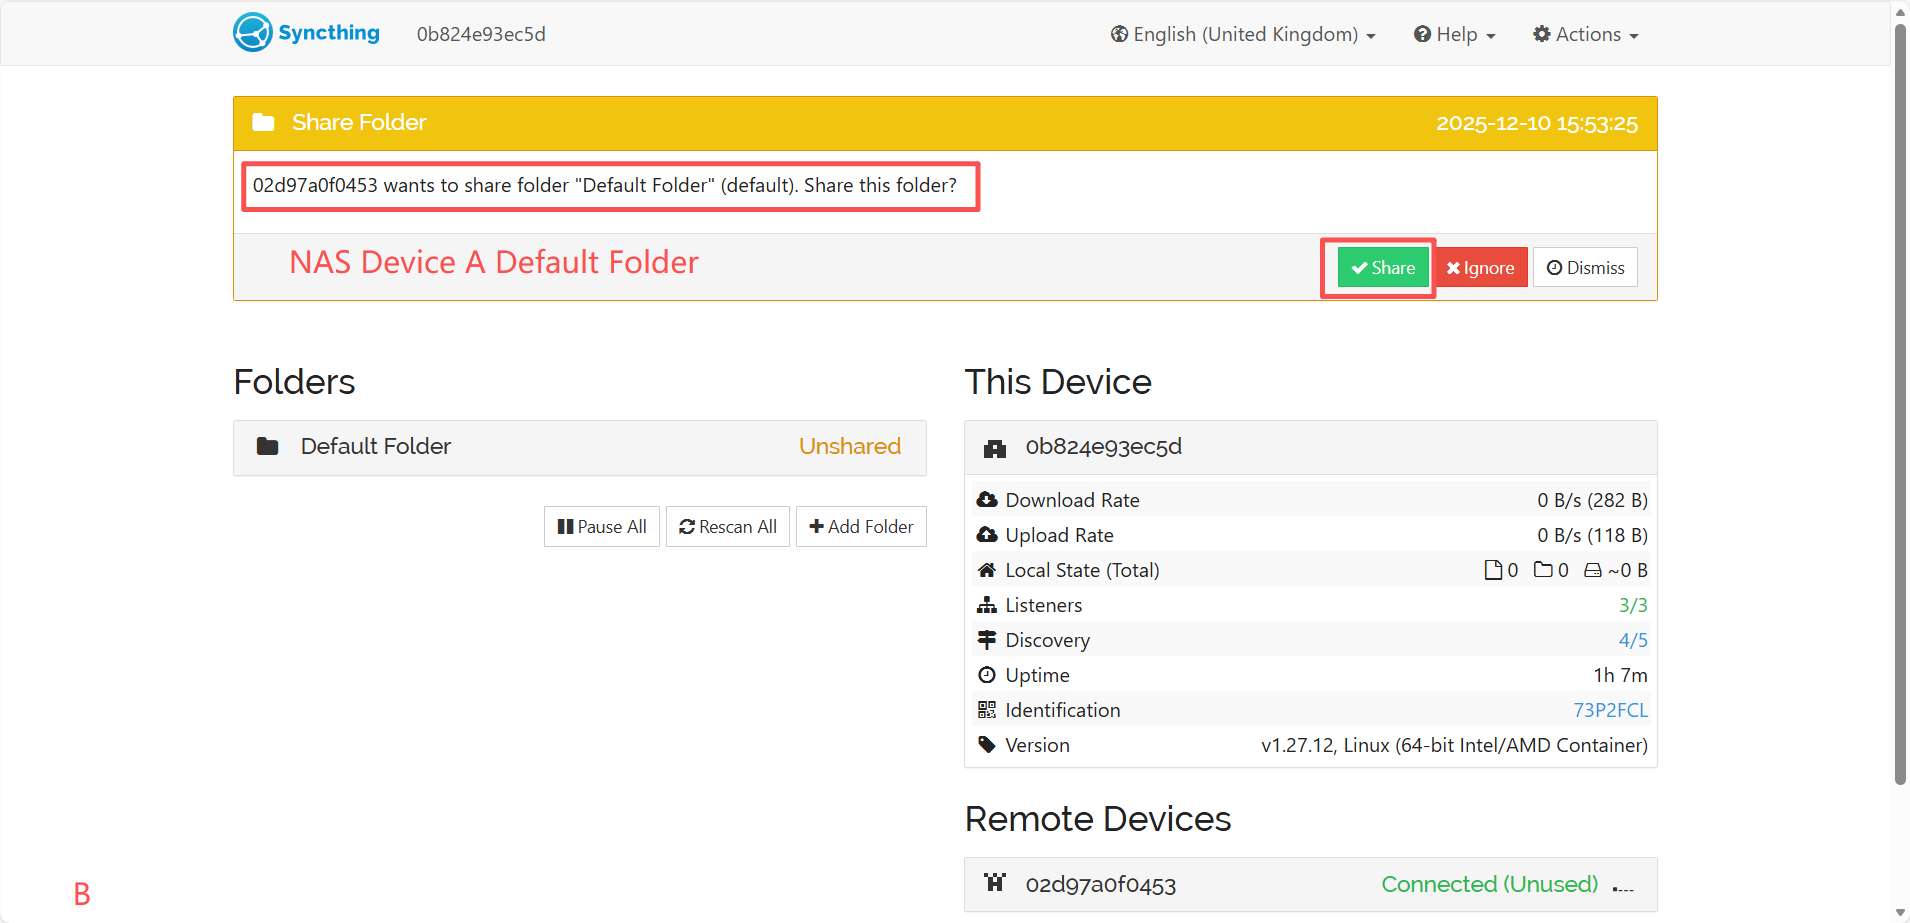
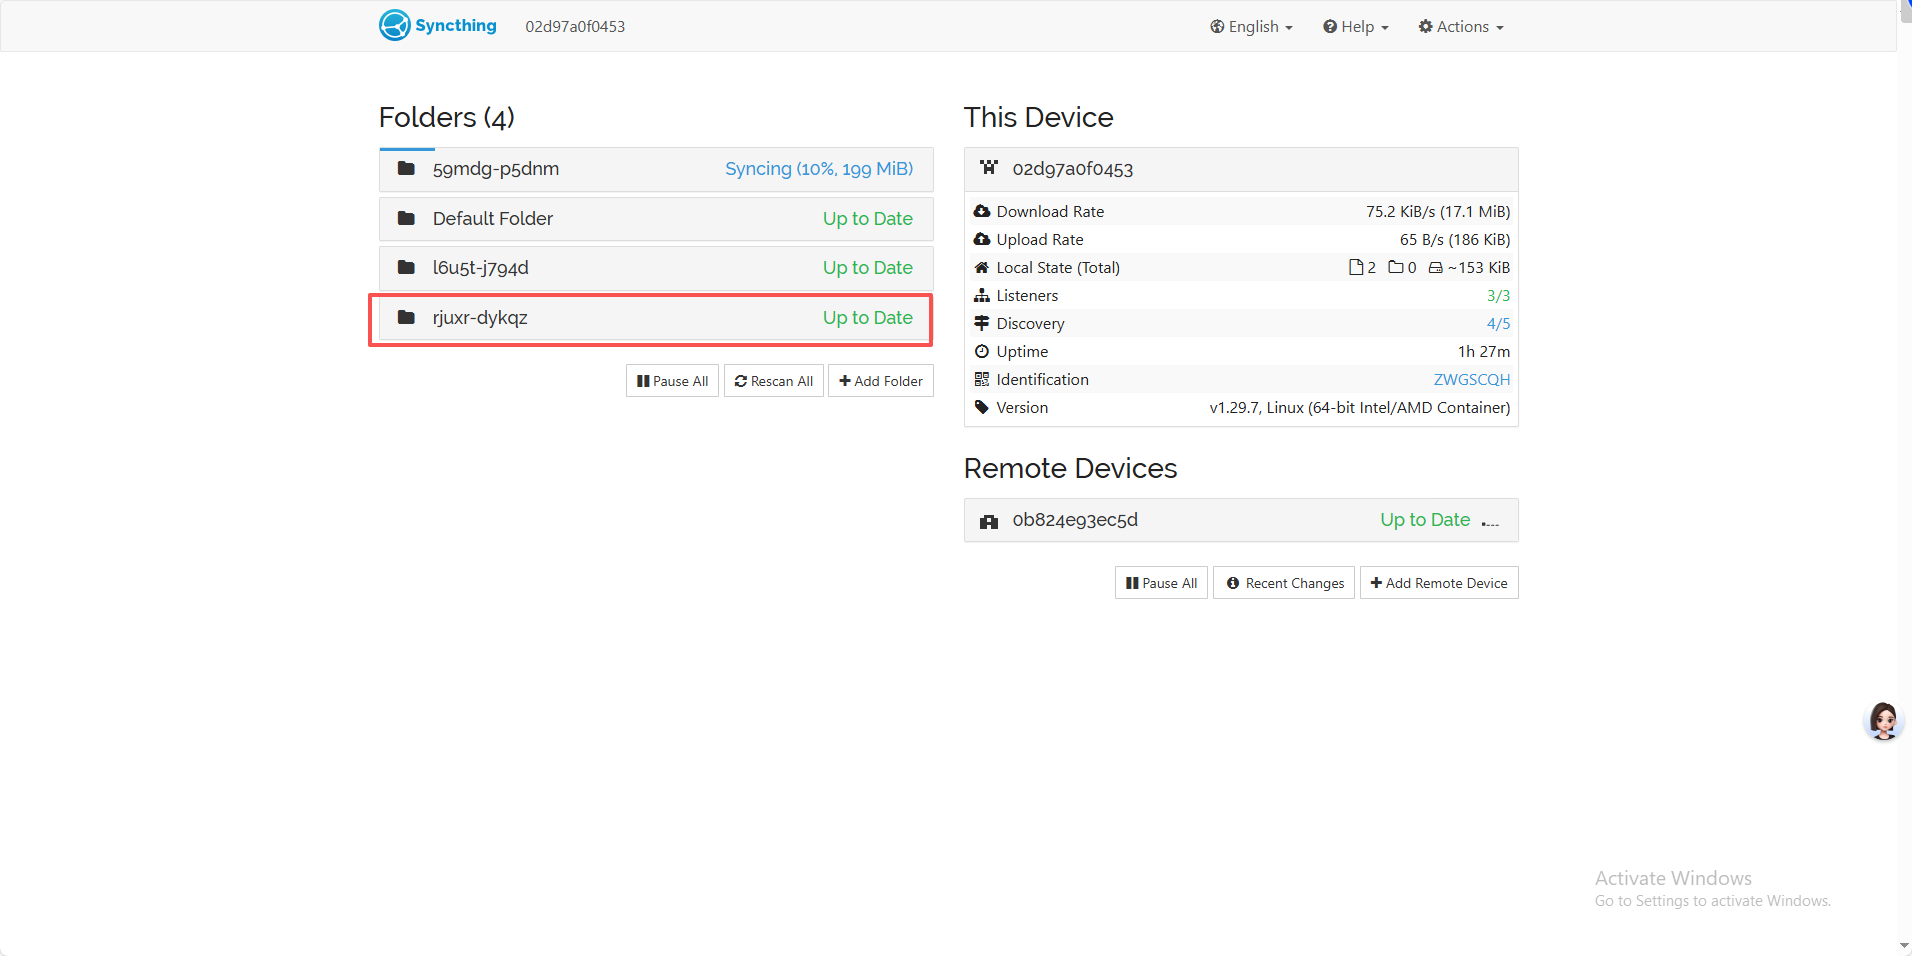
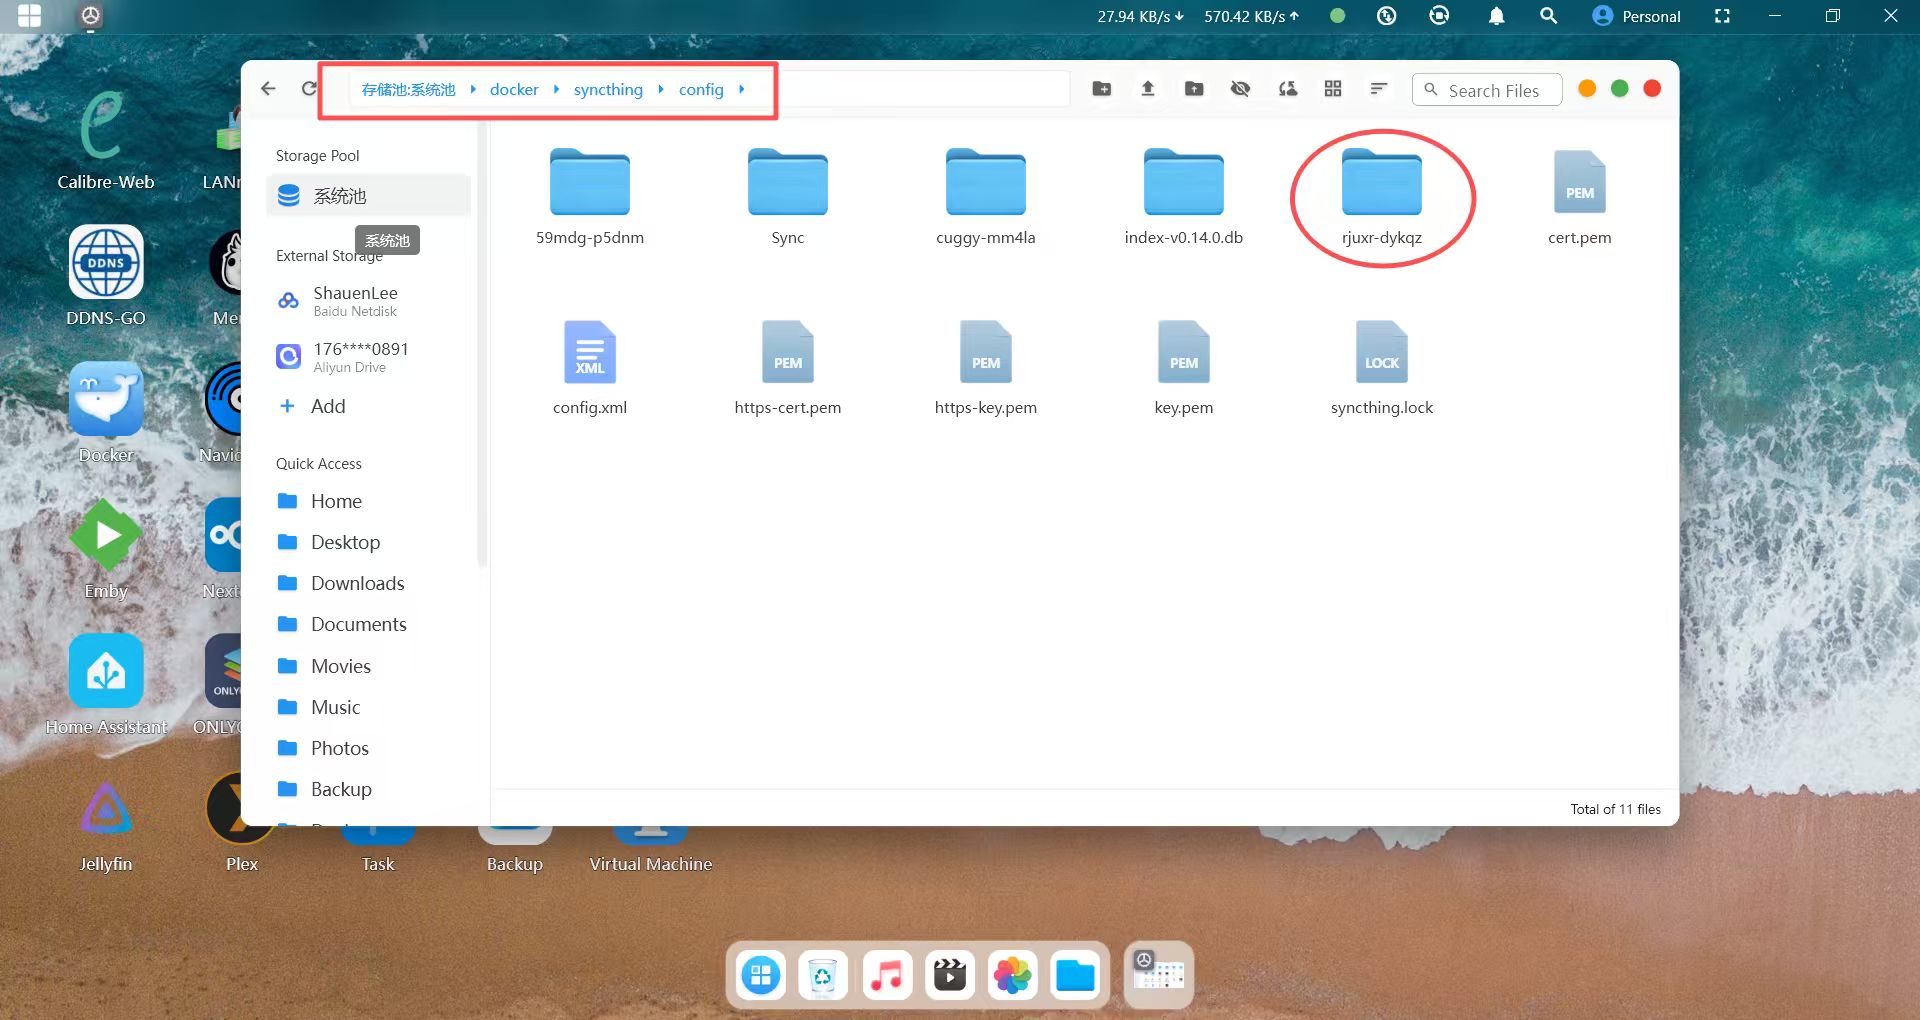
3.After the folder sharing is successful, return to the Cyber Cloud software on NAS Device B, click File Management, and you will be able to view the folder shared from NAS Device A to NAS Device B.

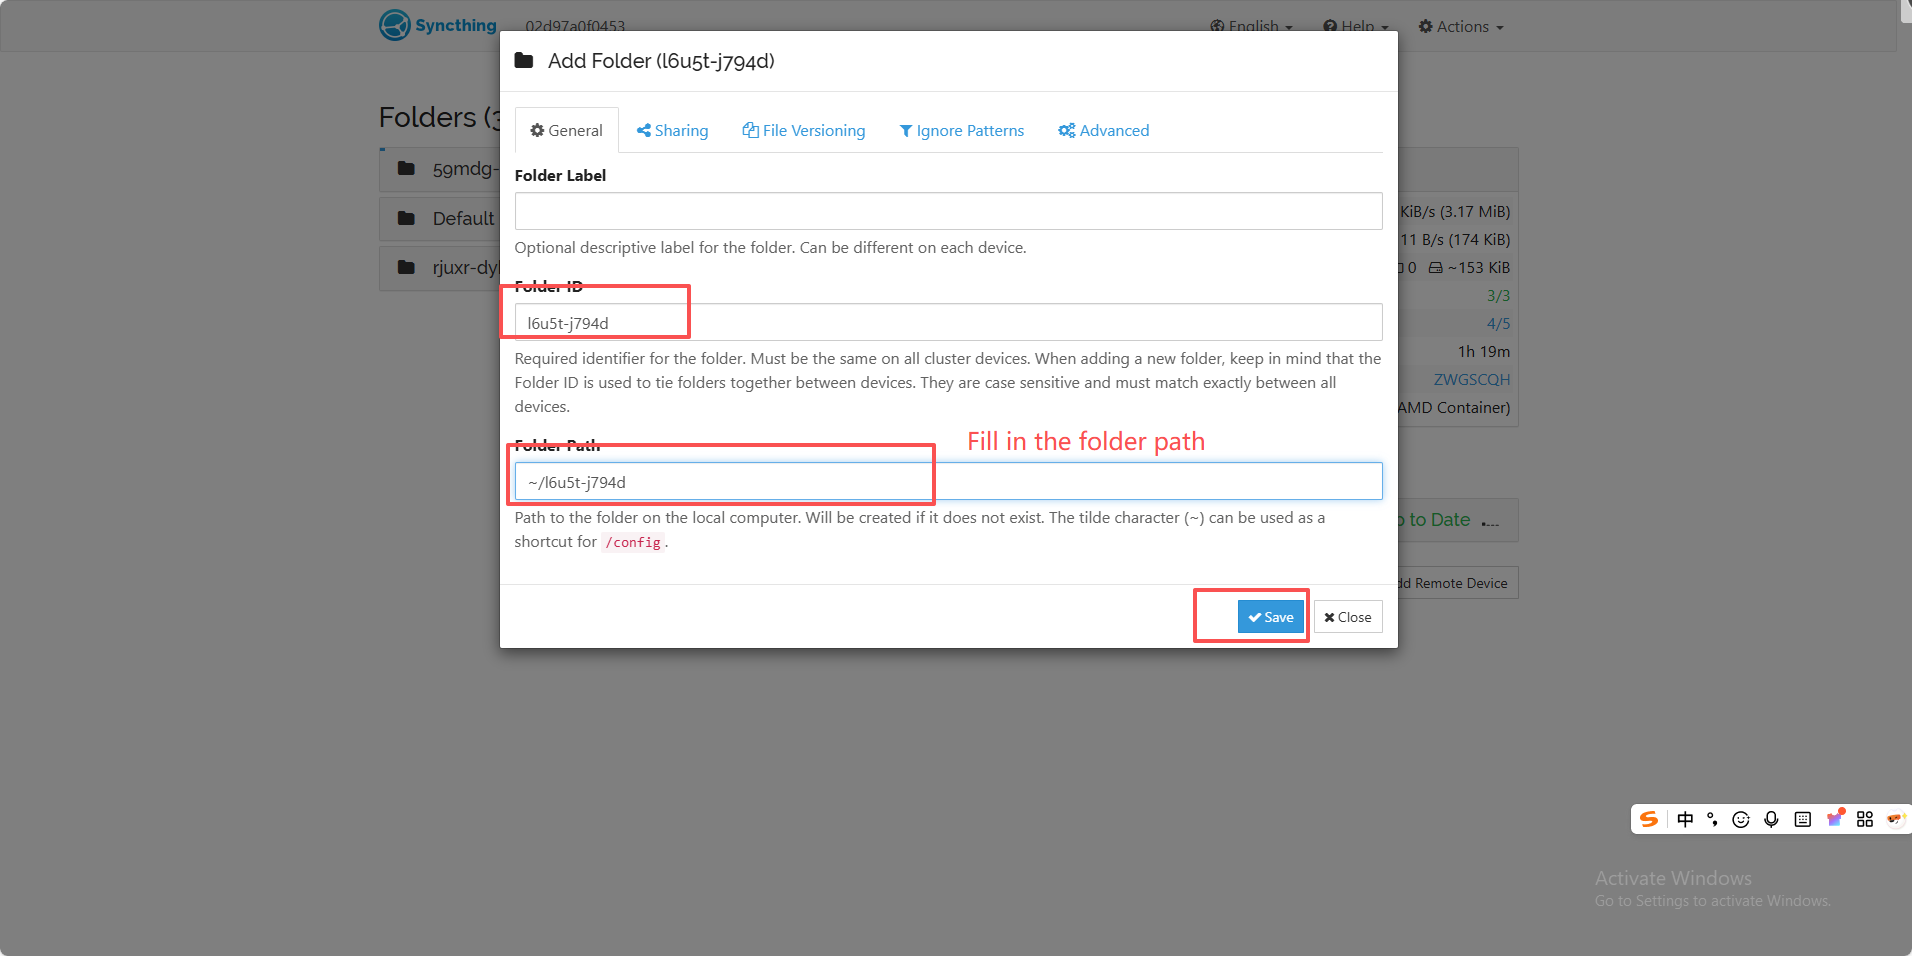
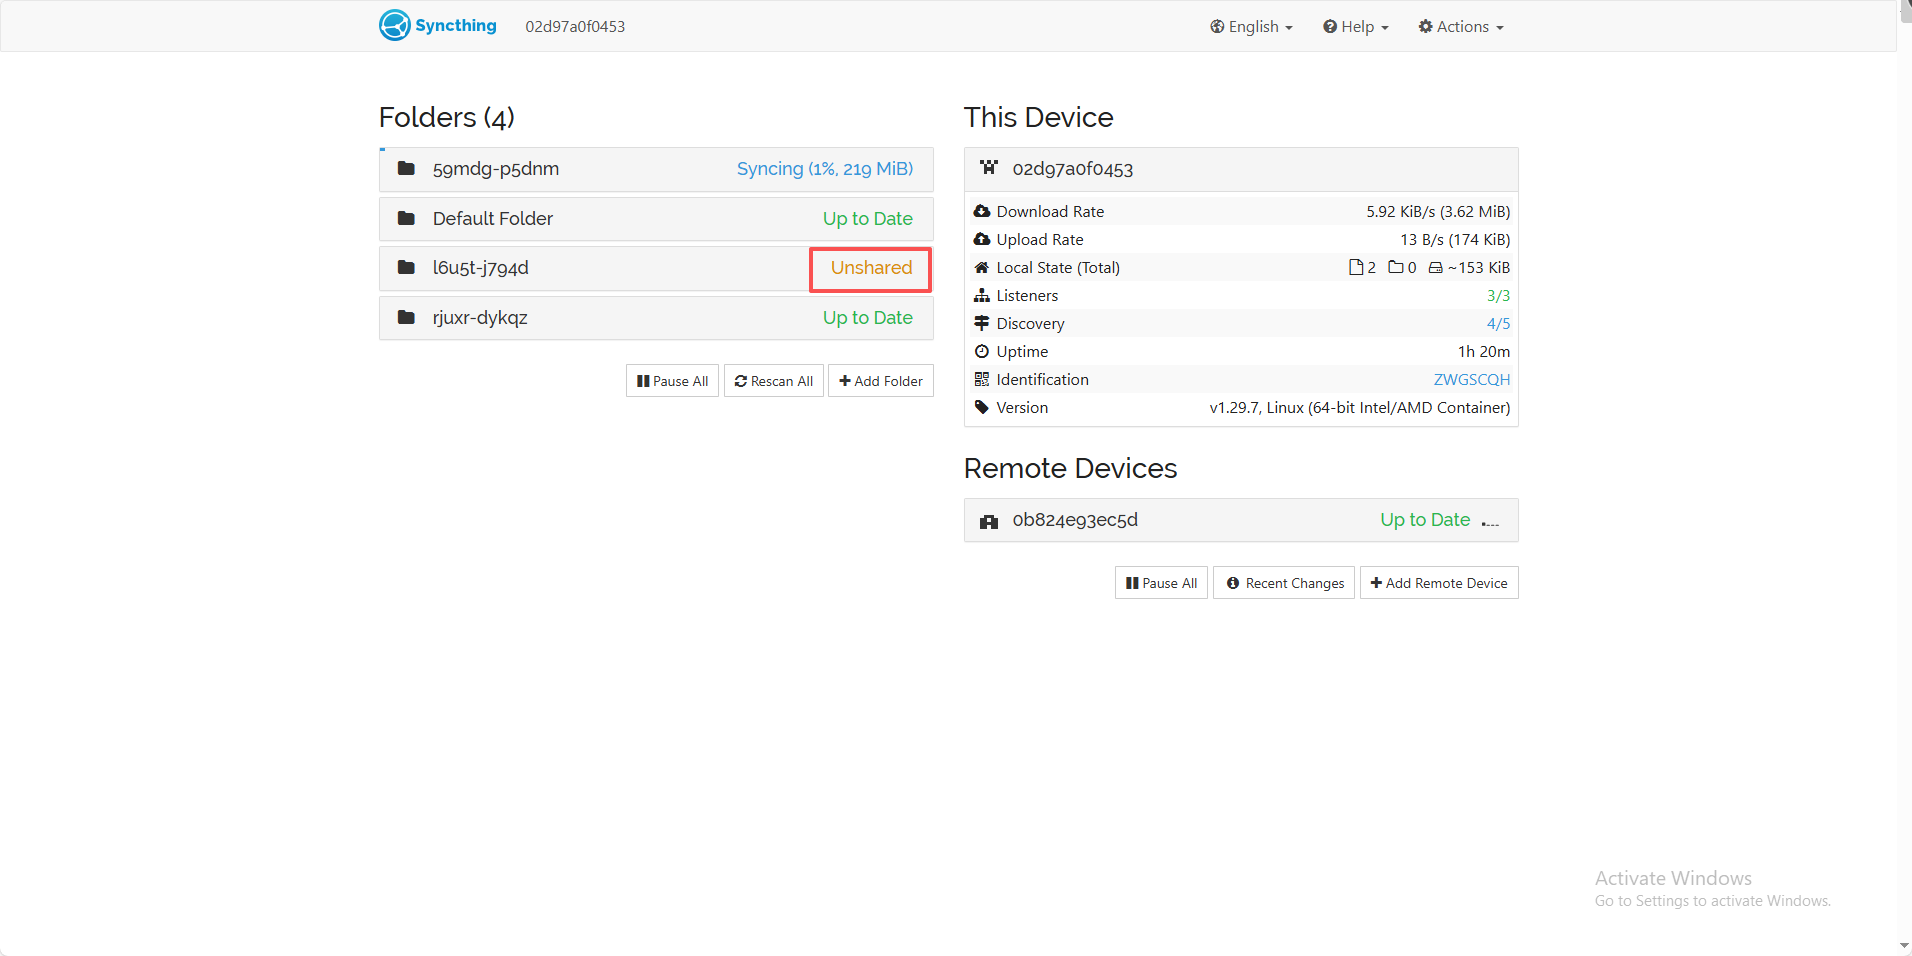
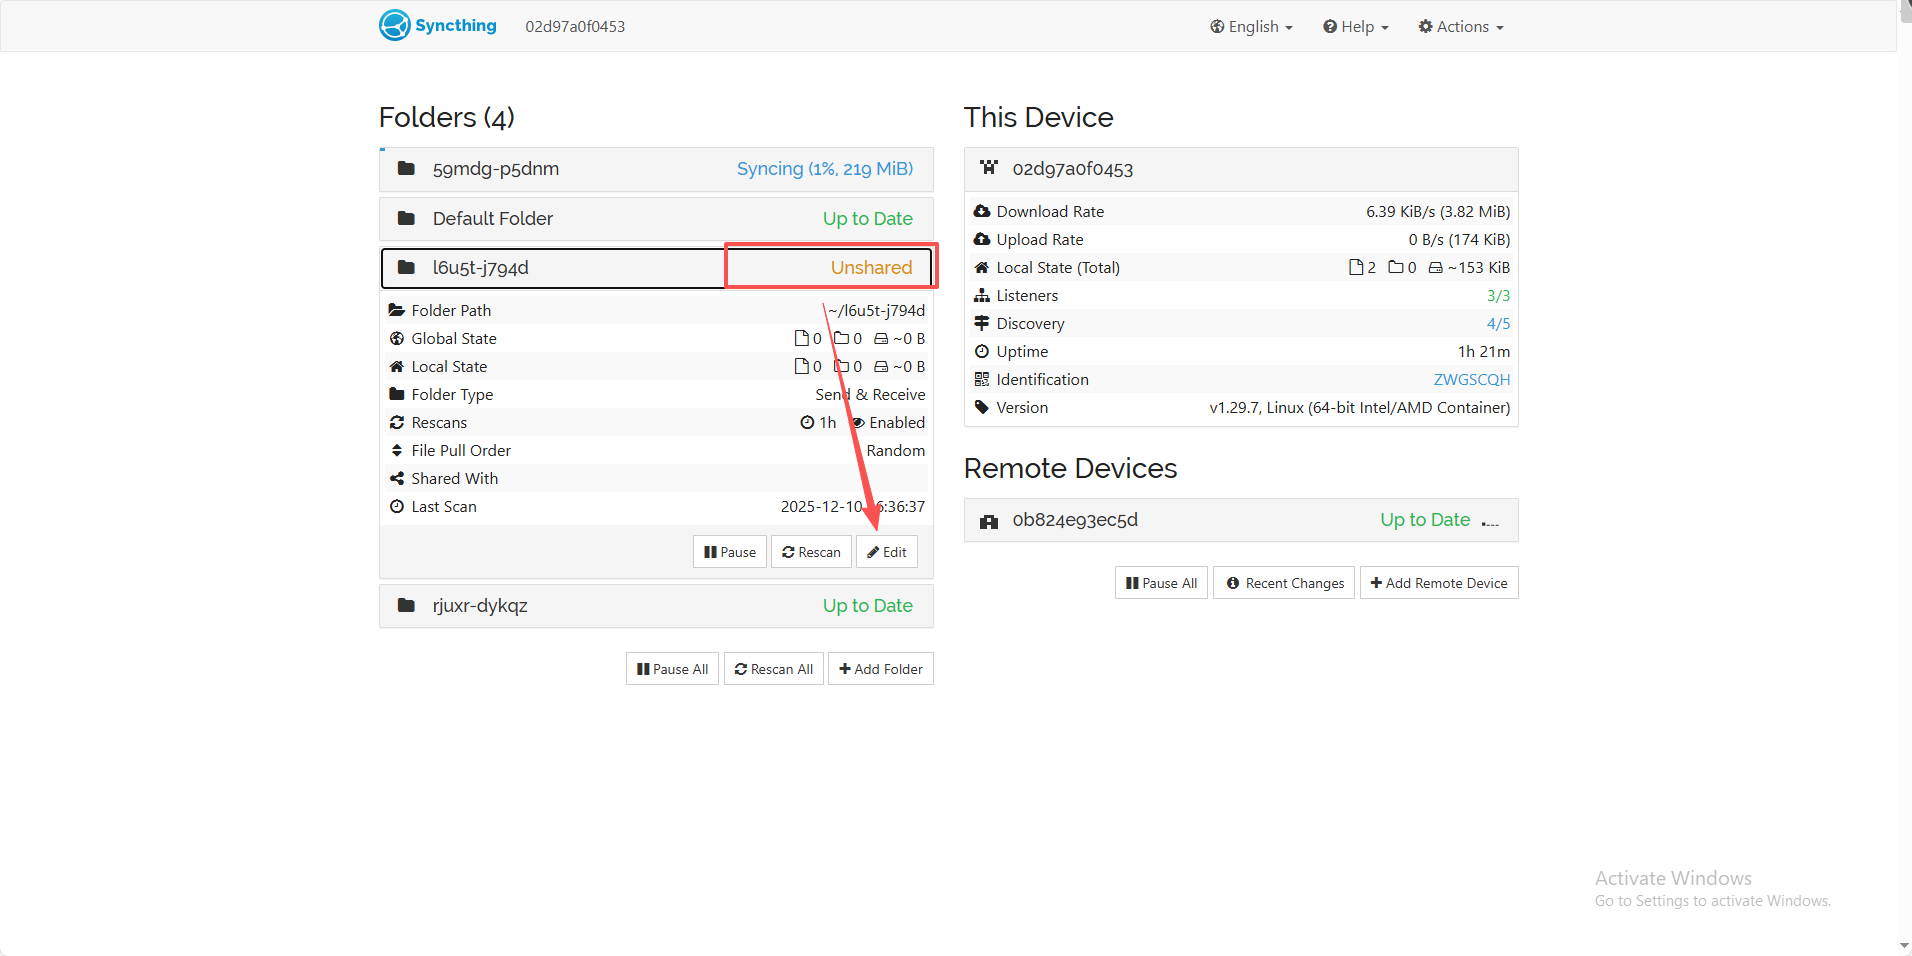
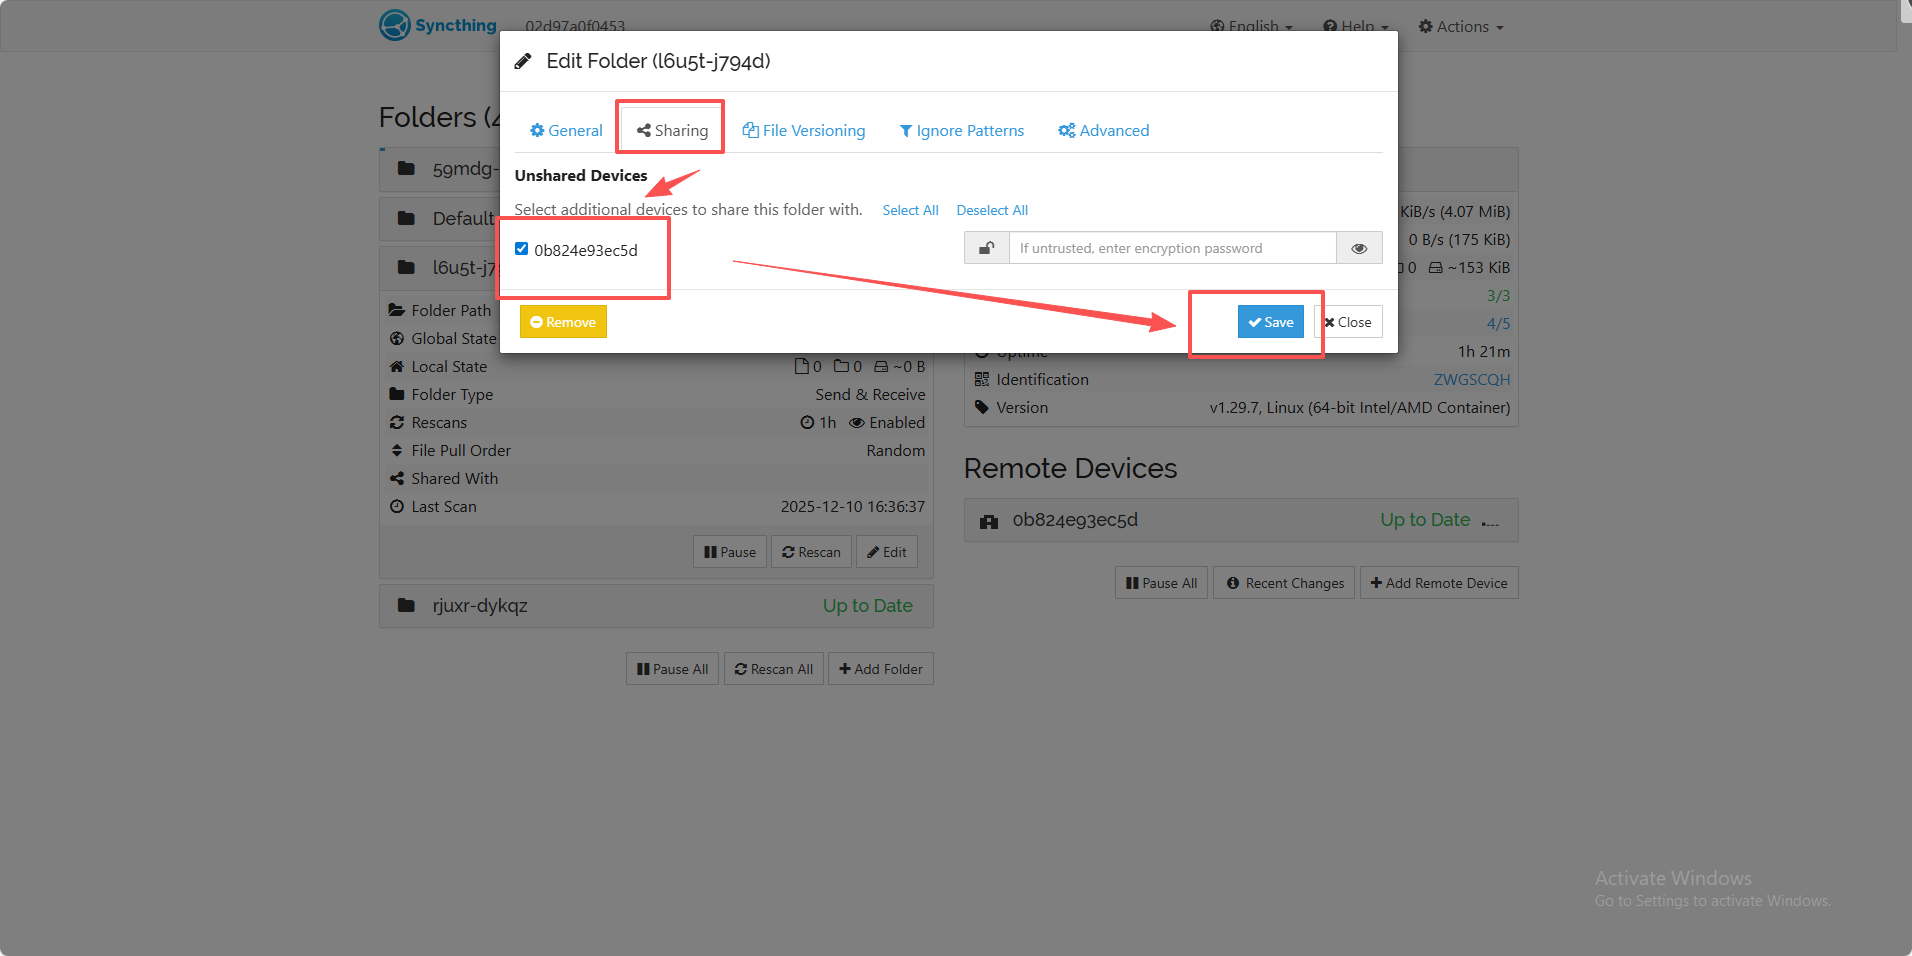
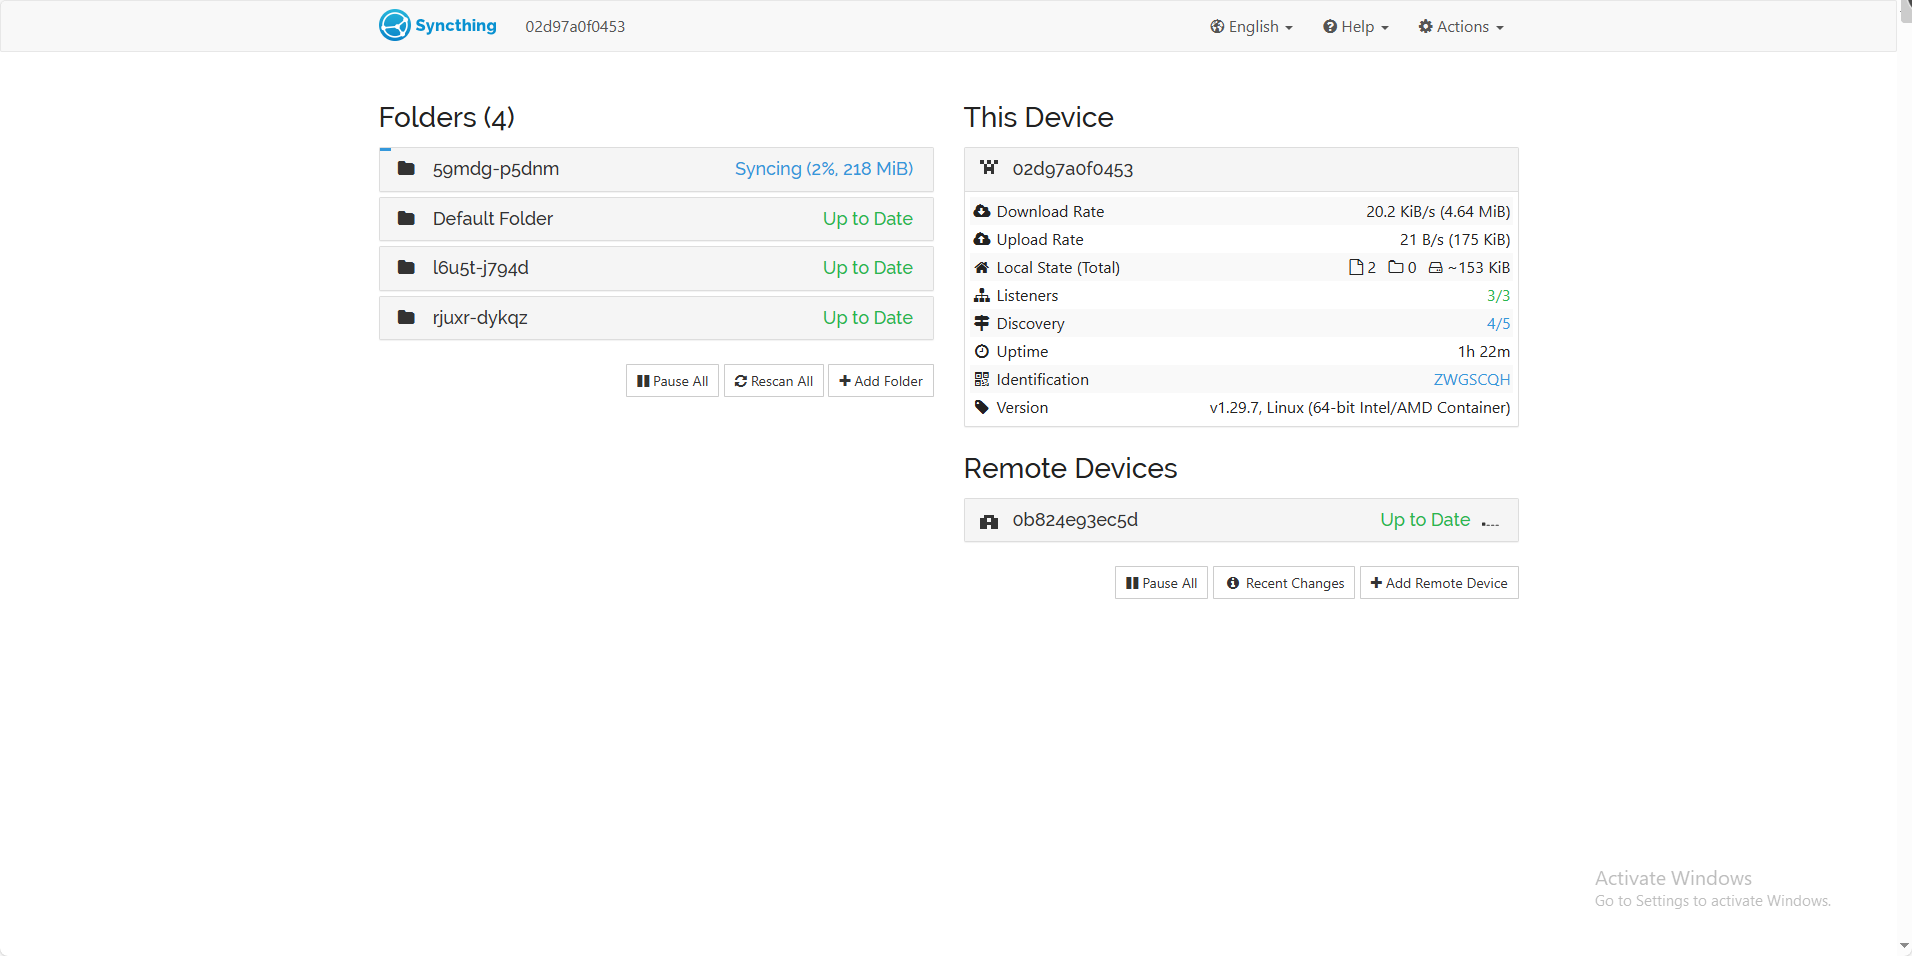
2.After creation, the newly added folder will be in a "Not Shared" state because we have not yet shared it with the remote device. We need to enable sharing for this folder. Click on the folder, then go to Options -> Sharing, check the devices you want to share with, and click "Save" to apply the settings. Similarly, the Syncthing web page on NAS Device B will also receive a notification to add the new folder. The operation method is the same as described above.
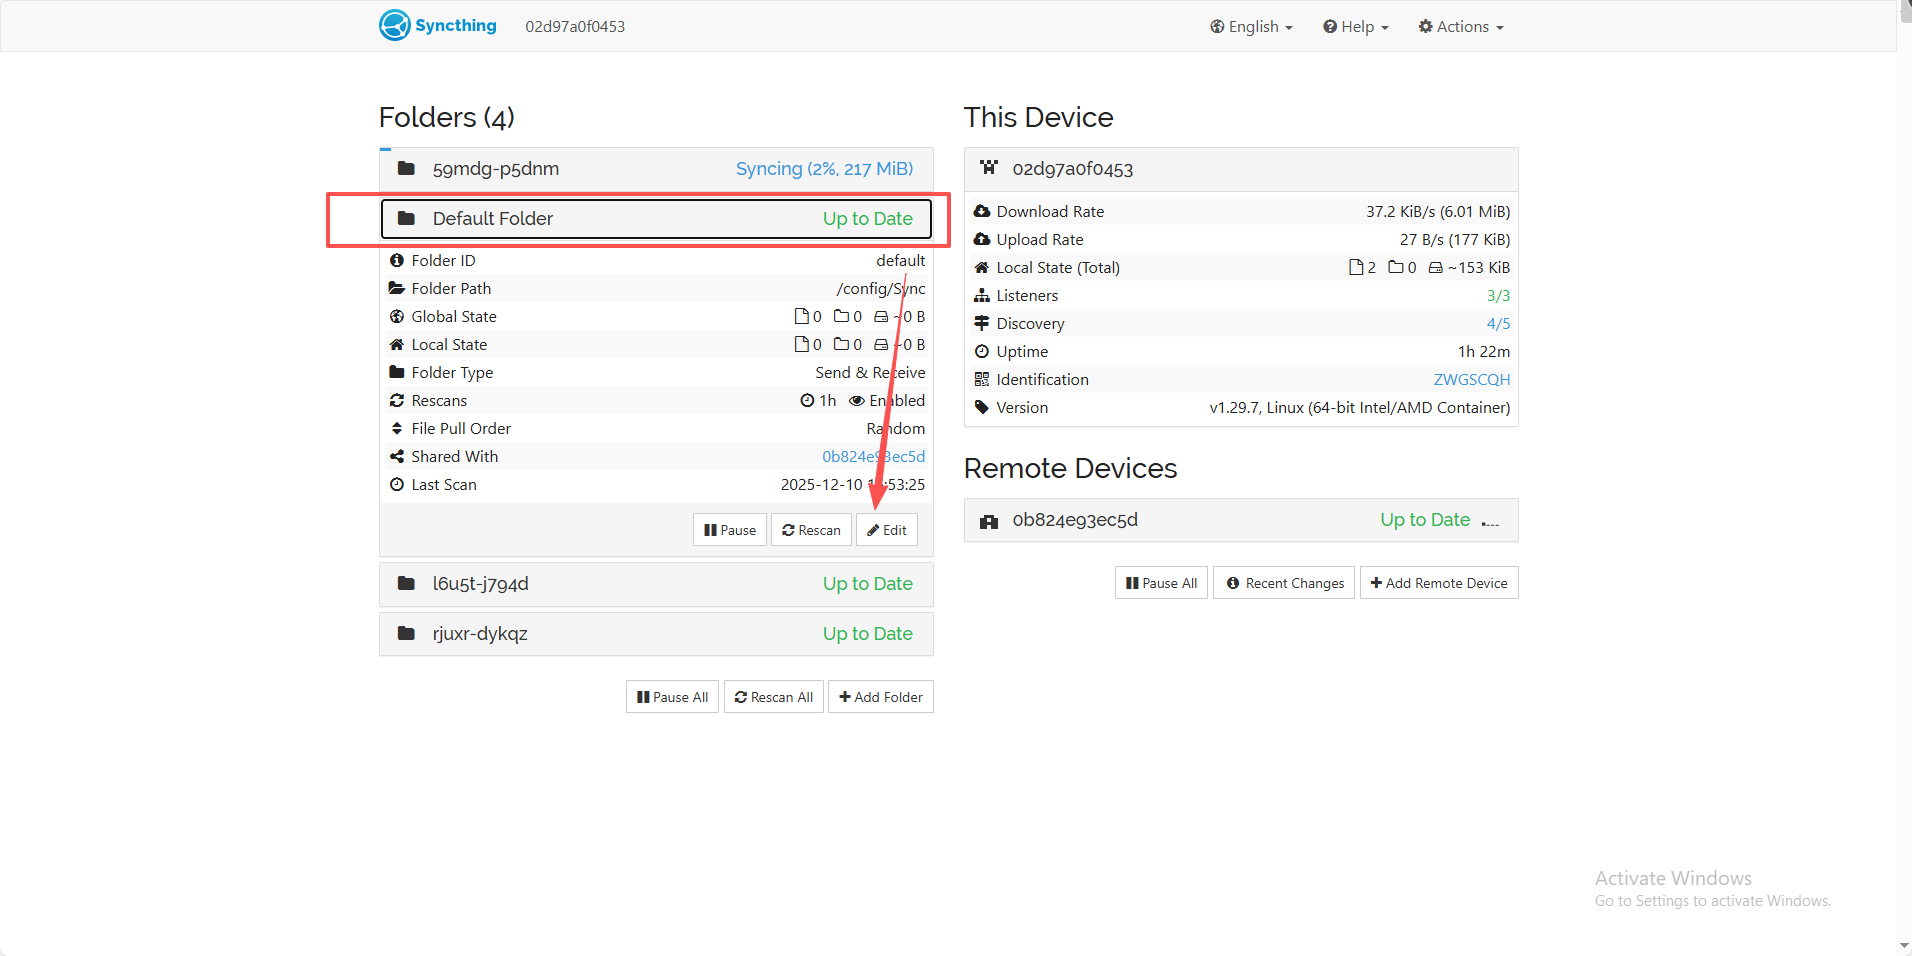
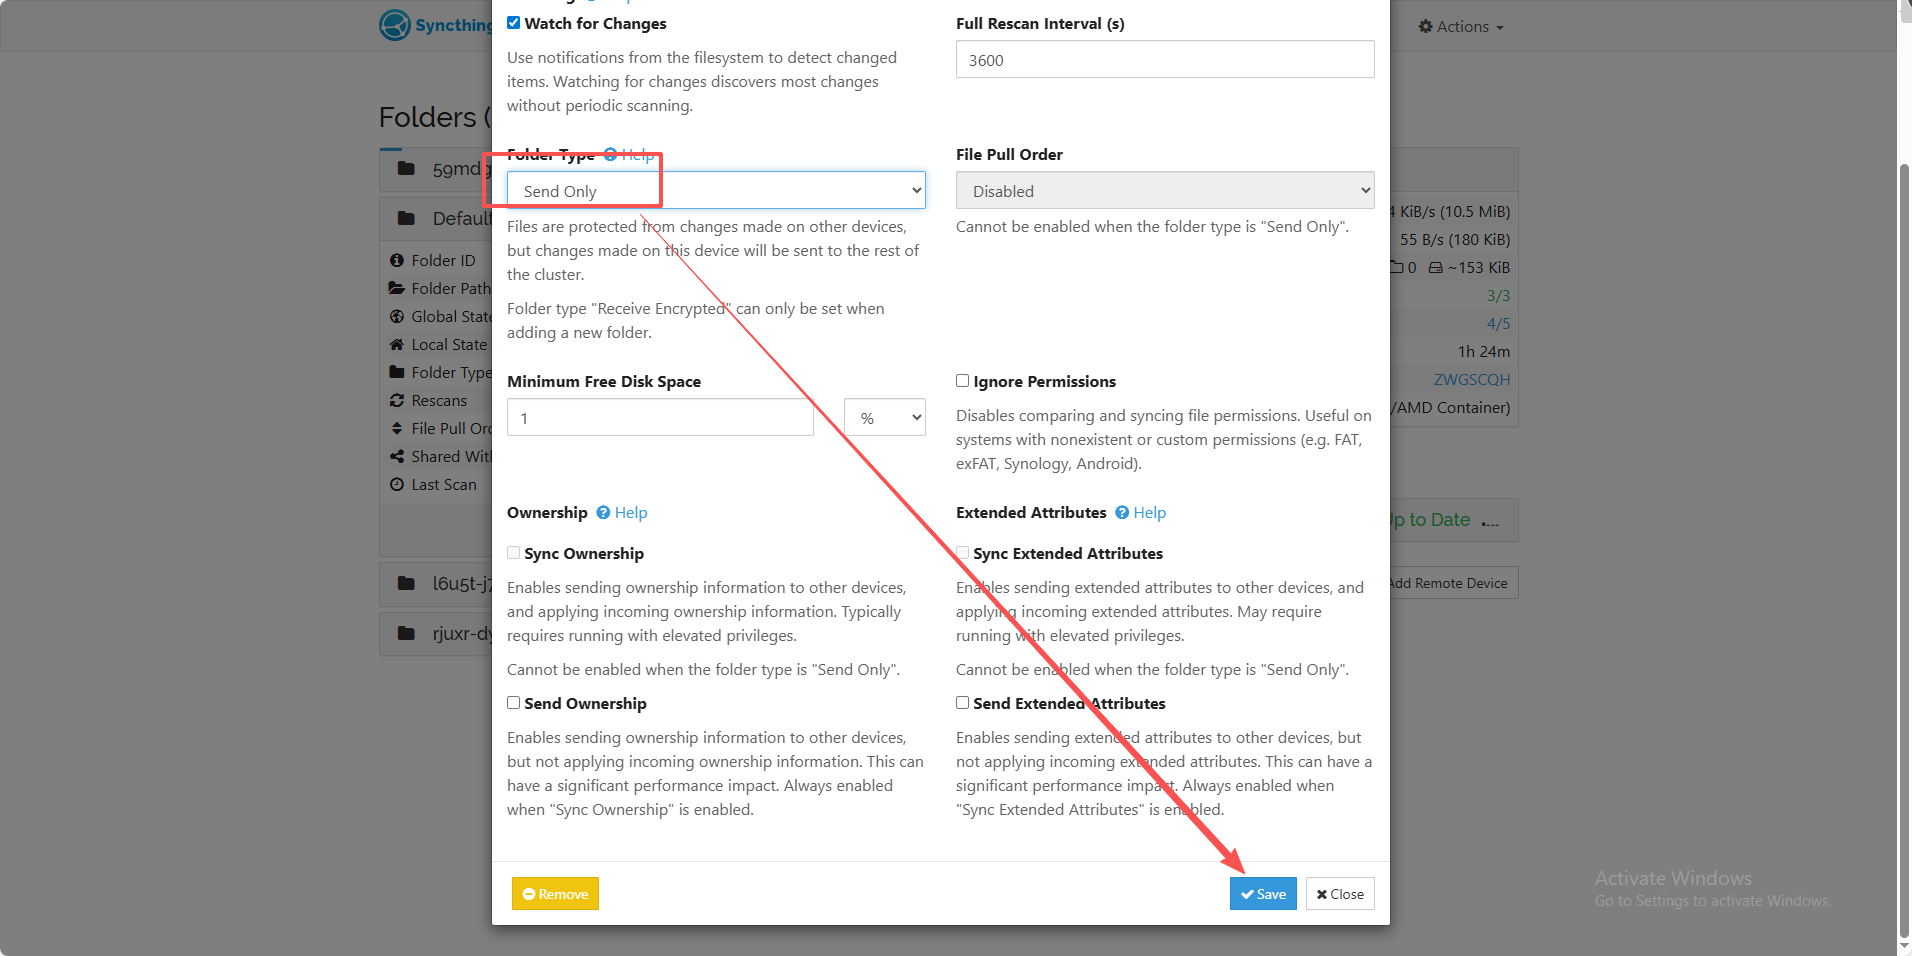
2.In the pop-up page, select the "Advanced" tab and locate the Folder Type setting.
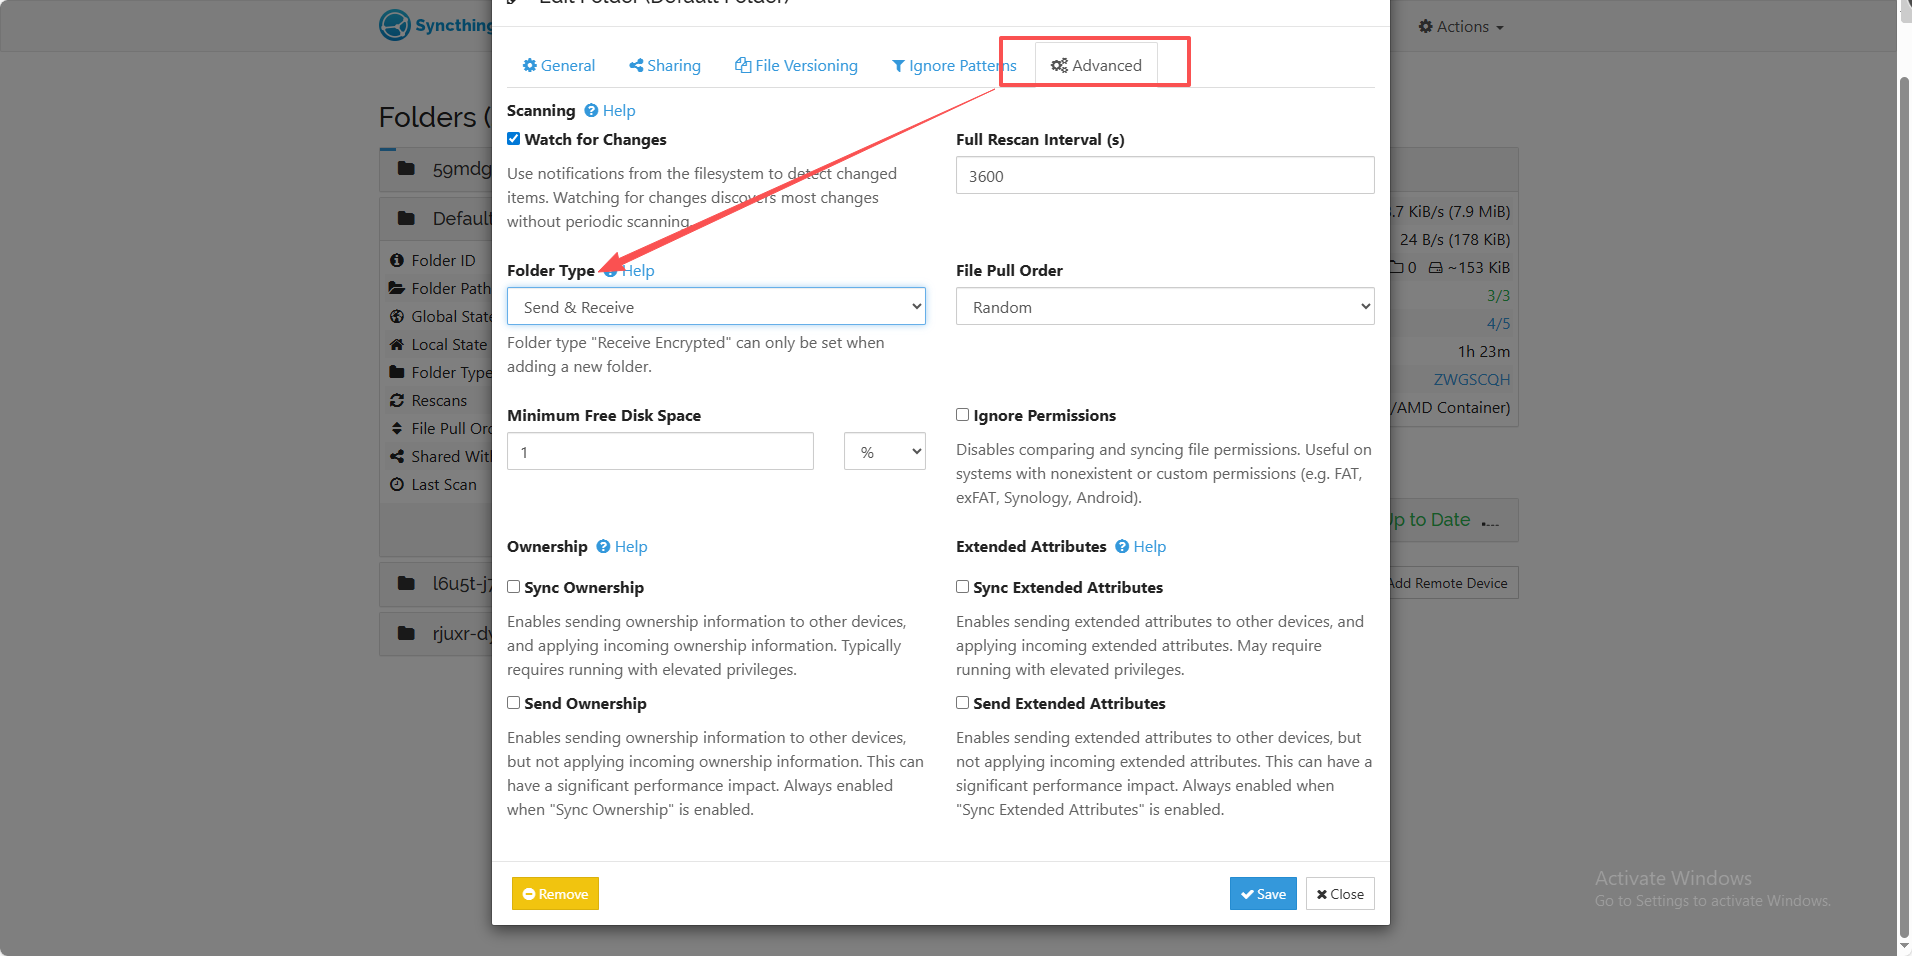
3.Change the default folder type from "Send & Receive" to "Send Only", then click "Save" to apply. This will protect the files so that they cannot be modified on other devices, but changes made on this device will be sent to other devices in the cluster.